

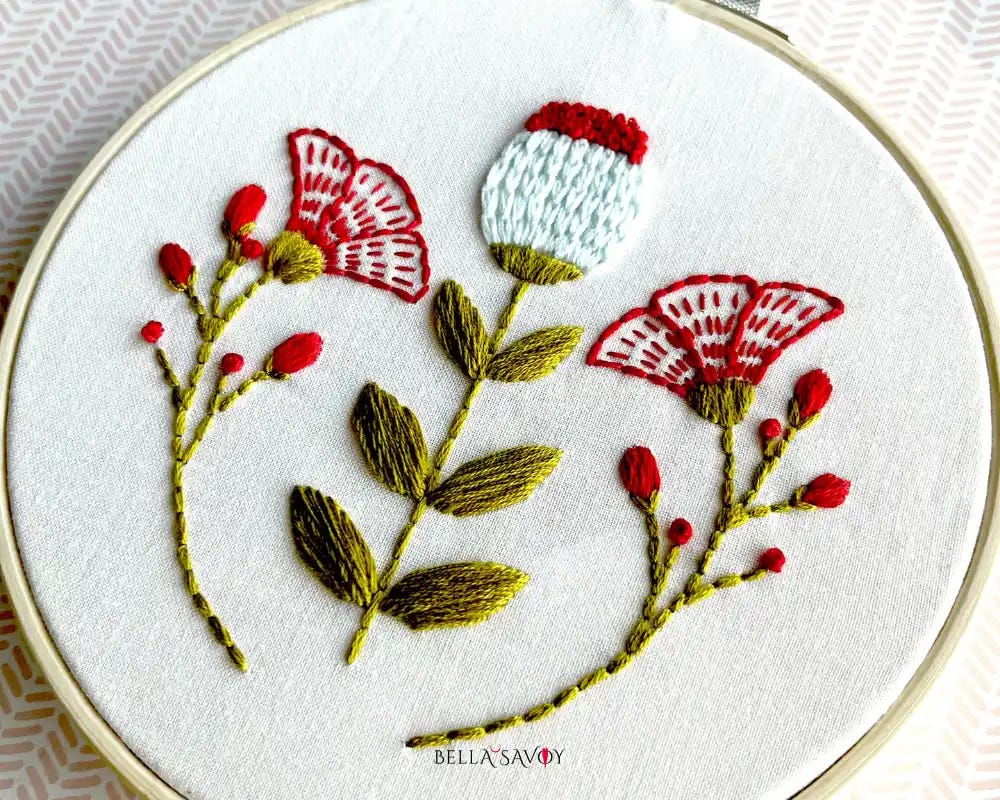
You’ve got your hoop, your floss, your needle — and now you’re staring at a blank piece of fabric wondering, okay, but what do I actually do? That’s exactly where this guide comes in.
Learning your first few basic embroidery stitches is one of those rare things that’s both simpler and more satisfying than you might expect. Most people are surprised by how quickly it clicks. Within a single sit-down session, you can go from total beginner to someone who genuinely knows what they’re doing — and that feeling is hard to beat.
This embroidery stitch tutorial covers five stitches that will carry you through pretty much any beginner project: the running stitch, back stitch, satin stitch, chain stitch, and French knot. Together, they let you create outlines, fills, texture, and fine detail. A small set of tools, but they go a long way.
The five essential basic embroidery stitches for beginners are: the running stitch, back stitch, satin stitch, chain stitch, and French knot. The running stitch creates a dashed outline. The back stitch creates a solid line. The satin stitch fills shapes. The chain stitch adds texture. The French knot creates dimensional dots and detail.
Disclosure: As an Amazon Associate, I earn from qualifying purchases at no extra cost to you.
Click here for a FREE EMBROIDERY PATTERN
What You Need Before You Start
You don’t need much to get going. Here’s the short version:
Embroidery hoop — holds your fabric taut while you stitch
Embroidery floss — standard 6-strand cotton floss works great
Embroidery needle — a bit blunter than a sewing needle, with a larger eye
Fabric — plain cotton or linen is ideal for beginners
Small scissors — the sharper the better
If you want to go deeper on supplies, I’ve got a whole post on embroidery supplies for beginners with specific recommendations. And if you’re not sure how to get your fabric into the hoop, this hooping tutorial walks you through it step by step.
A quick note on thread strands: Most embroidery floss comes with 6 strands twisted together. I’m sure you’ve figured out that more strands mean thicker, bolder lines. Fewer strands make finer, more delicate work. Experiment to see what you like!
Running Stitch
Best for: outlines, borders, decorative details, and dashed effects
The running stitch is the very first of the basic embroidery stitches most beginners learn — and for good reason. It’s simple, it’s quick, and it’s incredibly useful.
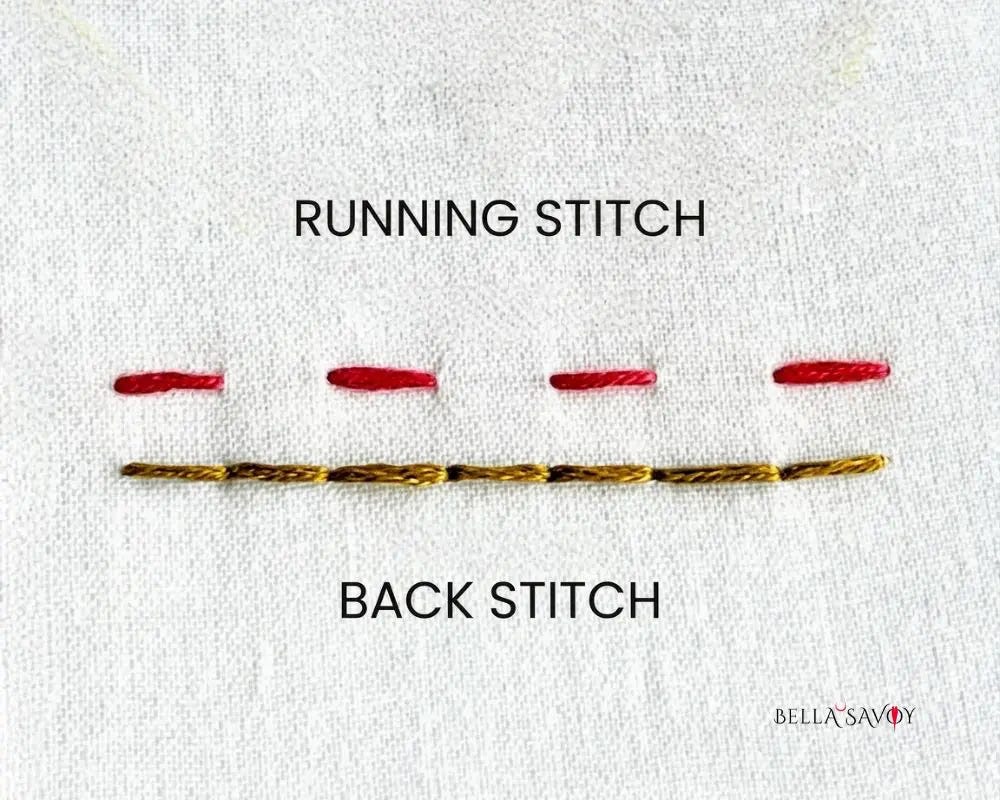
Picture the dashed lines painted on a highway. That’s essentially what a running stitch looks like: a row of evenly-spaced stitches with gaps in between.
How to do it:
Bring your needle up through the fabric from the back to the front.
Push it back down a short distance ahead to create one straight stitch.
Skip a small gap, then bring the needle up again.
Repeat, keeping your stitch lengths and gaps as consistent as you can.
The gaps and the stitches don’t have to be the same length as each other — play around with longer or shorter gaps to create different effects. This is one of those stitches where there’s real room for personality.
Pro tip: Running stitch is also used in some forms of hand quilting and sashiko embroidery, so this little stitch has range!
If you want to explore the creative variations — including how to use uneven spacing for different effects — my running stitch tutorial goes into all of it.
Back Stitch
Best for: outlines, lettering, curved lines, and anywhere you want a solid continuous line
If the running stitch is a dashed line, the back stitch is a solid one. It’s probably the most useful stitch in this entire guide, and the one you’ll reach for most often when outlining a design or stitching lettering.
It starts the same way as the running stitch, but instead of moving forward to make each new stitch, you go back to meet the end of the previous one. This closes the gaps and creates a smooth, unbroken line.
How to do it:
Bring your needle up through the fabric.
Push it back down to make one straight stitch — just like the running stitch.
Skip a stitch-length gap and bring your needle up again.
Now instead of continuing forward, go back and push the needle down at the end of the previous stitch. This fills in the gap.
Come up another stitch-length ahead of where you just came up.
Repeat steps 4–5 until your line is as long as you need.
My full back stitch tutorial also covers how to keep your curves smooth and your stitch tension consistent — worth a look once you’ve had a first go.
Satin Stitch
Best for: filling in shapes, creating smooth colour blocks, petals, leaves, and any solid fill
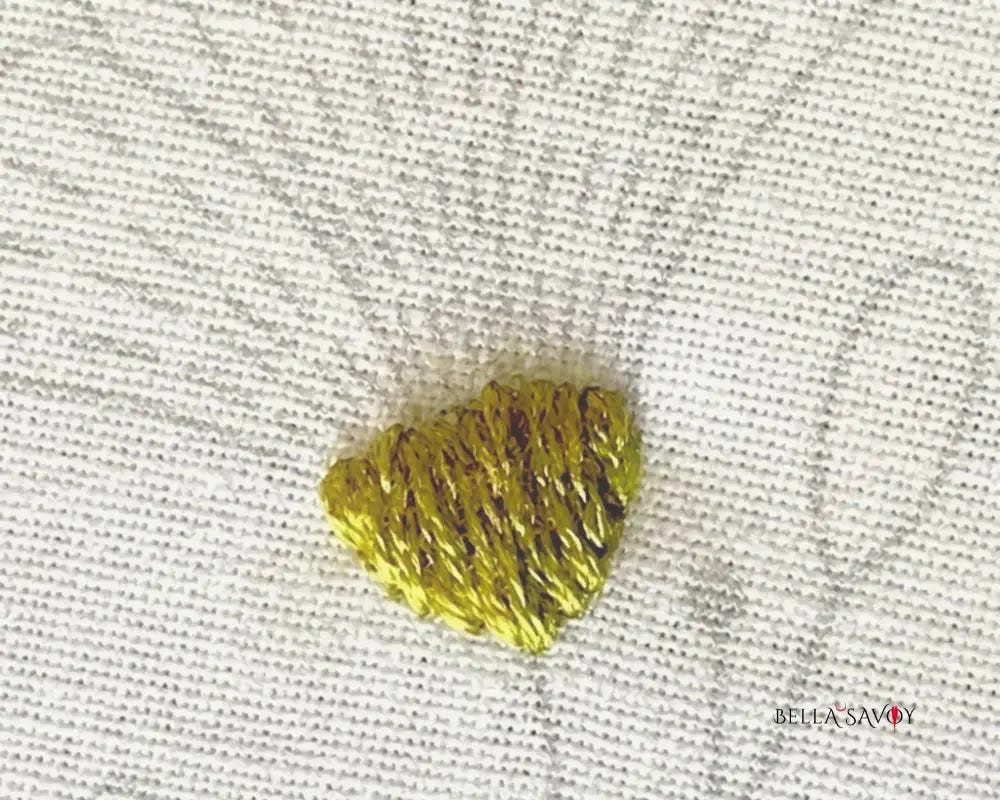
The satin stitch is how you fill shapes in embroidery. Instead of outlining, you’re laying parallel rows of thread side by side until a shape is completely filled in. The result is a smooth, almost glossy surface — like satin fabric, hence the name.
It looks a little more advanced, but it’s really just a series of straight stitches placed right next to each other. The key is keeping them even and snug.
How to do it:
Decide on the angle of your stitches (horizontal, vertical, or diagonal all work).
Bring your needle up at one edge of your shape.
Push it down at the opposite edge to make one long straight stitch spanning the shape.
Bring it back up right next to where you started (not leaving a gap).
Push it down right next to where you finished.
Keep repeating, packing the stitches close together until the shape is filled.
There are a few different methods to adding this simple stitch — I cover them all in my satin stitch tutorial.
Chain Stitch
Best for: outlines with more texture and dimension, filled areas, and decorative borders
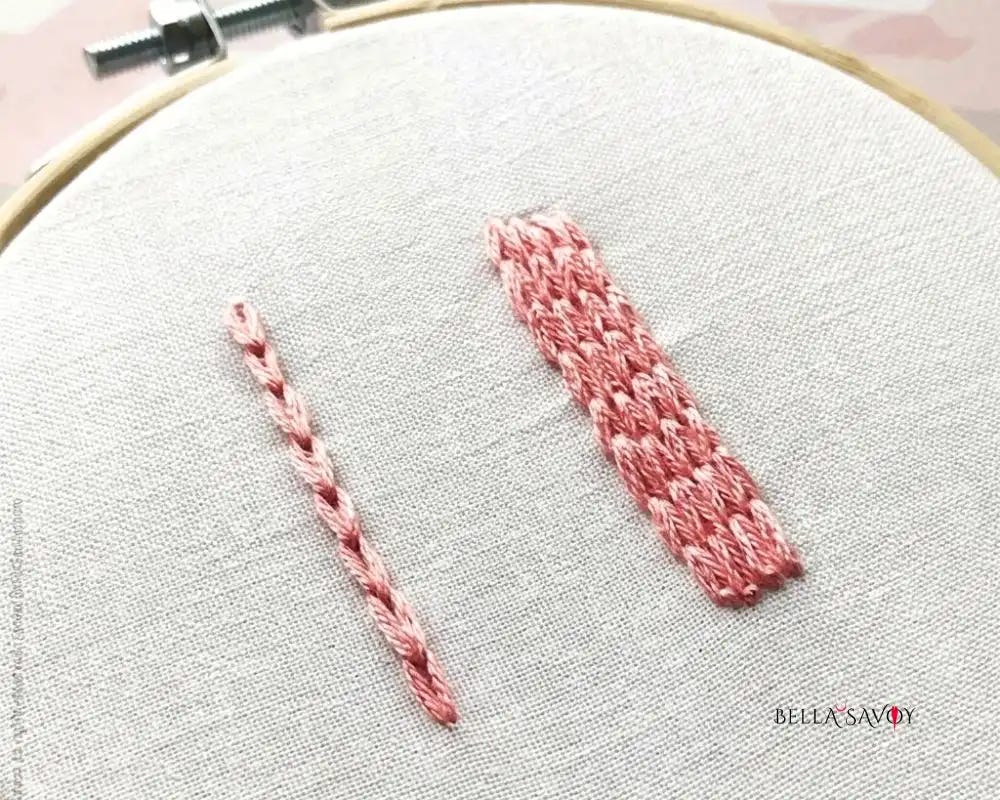
The chain stitch is one of the most satisfying stitches to make once you get the rhythm of it. Each stitch forms a little loop, and each loop connects to the next — creating a chain. Use it as a thicker, more textured alternative to the back stitch, or fill an entire shape by stitching row after row.
How to do it:
Bring your needle up through the fabric.
Push it back down through the same hole (or very close to it), but before pulling it all the way through, leave a loose loop of thread on the surface.
Bring the needle up a stitch-length ahead, this time coming up through your loop.
Pull the thread through gently until the loop is snug against the fabric — not too tight.
To make the next link: push the needle down through the loop you just made (the same hole where you came up), and leave another loose loop.
Come up a stitch-length ahead through the new loop, and pull snug.
Repeat to grow your chain.
To finish the last loop: push the needle down just outside the loop to anchor it with a tiny tacking stitch.
The chain stitch can feel a little awkward at first — you can find my chain stitch tutorial for a deeper look at how it’s done.
French Knot
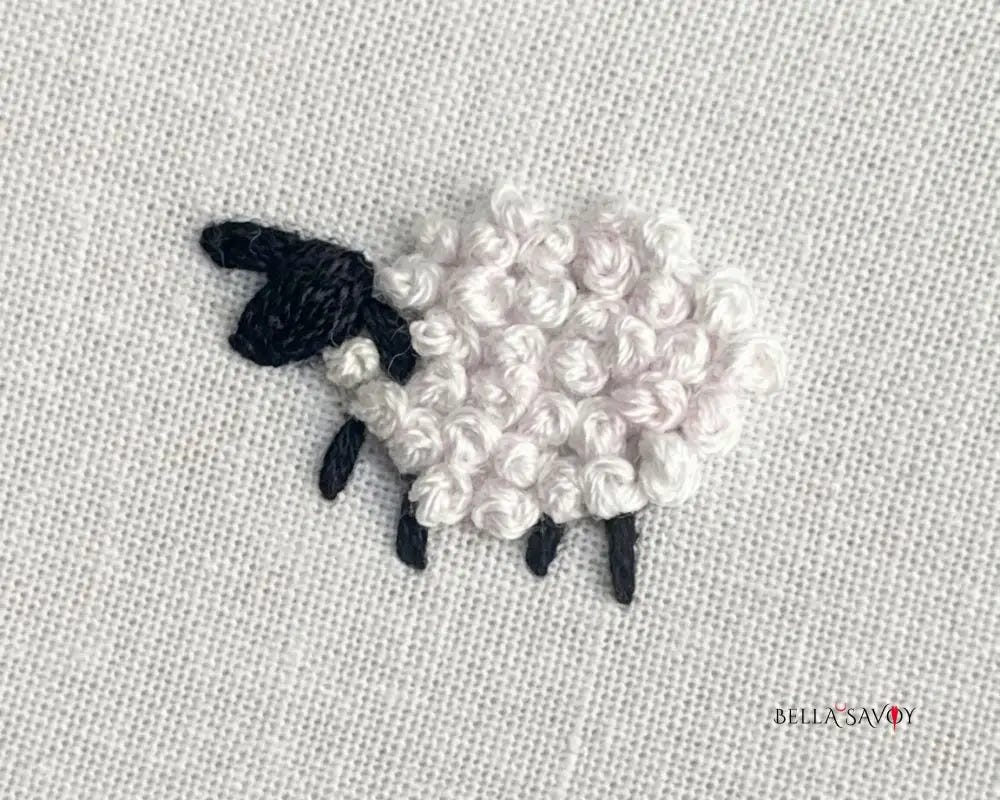
Best for: dots, flower centres, textured fills, eyes, berries, and scattered details
The French knot has a bit of a reputation for being tricky, but once it clicks, it really clicks. It’s a tiny dimensional knot that sits right on top of your fabric — perfect for adding little dots of texture and detail.
You control the size of the knot by how many times you wrap the thread around your needle. Two wraps is the standard starting point for beginners.
How to do it:
Bring your needle up through the fabric to the front.
Hold your thread taut with your non-dominant hand.
Wrap the thread around the needle twice (two wraps = a standard French knot).
Keep holding the thread taut and push the needle back down very close to where it came up — but not through the exact same hole or the knot will pull through.
As you push the needle down, keep your non-dominant hand pressing the wraps gently toward the fabric.
Pull the thread through slowly and steadily. A little knot will form!
My French knot tutorial goes into more depth and there’s also a video tutorial you can follow.
How to Use These Stitches Together
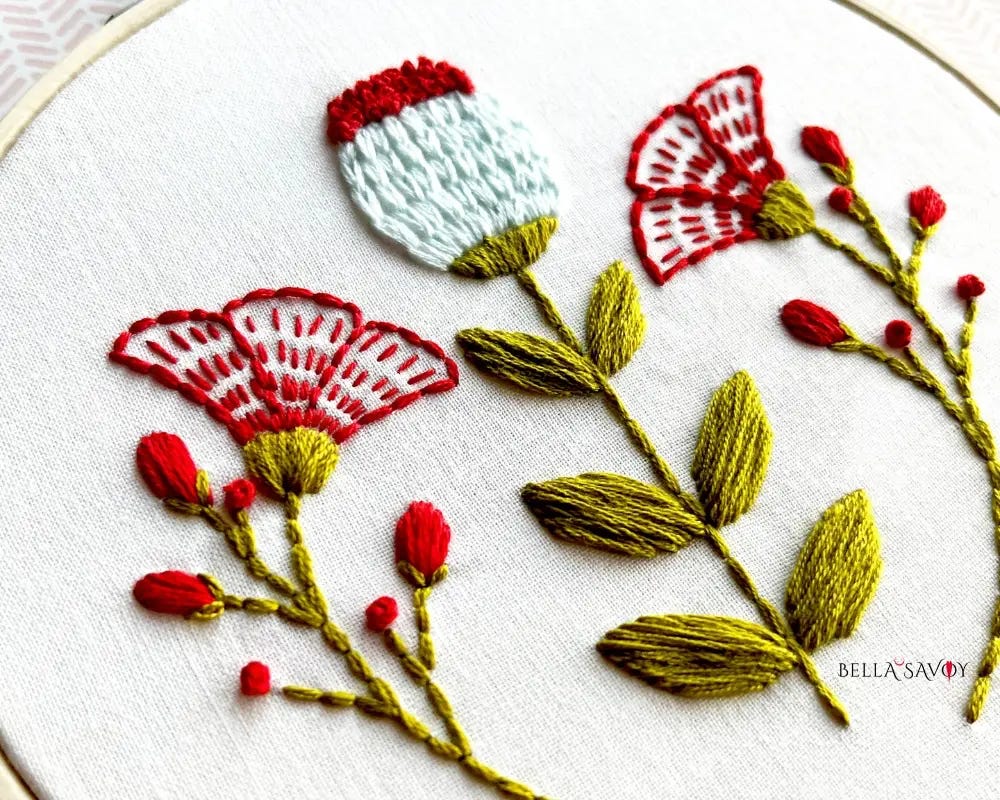
Here’s where it gets fun. These five basic embroidery stitches work beautifully together.
A typical beginner project might look like this:
Outlines → back stitch or running stitch
Stems and thin curves → back stitch or chain stitch
Petals and solid shapes → satin stitch
Flower centres, berries, and dots → French knots
Decorative borders → running stitch or chain stitch
Click here for a FREE EMBROIDERY PATTERN
What to Learn Next
Once you’ve practiced these five stitches and feel comfortable with them, here are some great next steps:
Lazy Daisy Stitch Tutorial — a simple looped stitch that creates instant flower petals
Fly Stitch Tutorial — perfect for leaves, feathers, and decorative details
How to Finish the Back of Your Embroidery Hoop — once you’ve finished a piece, here’s how to make the back look tidy
Embroidery Stick and Stitch Tips — an easy way to transfer designs to fabric
Embroidery is one of those crafts that rewards patience, and it has a way of becoming something you look forward to every single day. What matters most is that you get started — and enjoy the process along the way.
Happy stitching!
Did you find this embroidery stitches guide helpful? Save it to Pinterest or share it with a friend who’s been curious about learning how to embroider!
Frequently Asked Questions
What are the basic embroidery stitches for beginners?
The five most important basic embroidery stitches for beginners are the running stitch, back stitch, satin stitch, chain stitch, and French knot. These five stitches cover outlines, fills, texture, and detail — enough to complete most beginner embroidery projects.
What is the easiest embroidery stitch for beginners?
The running stitch is the easiest embroidery stitch for beginners. It’s simply a series of straight stitches with even gaps in between, similar to a dashed line. Most beginners can learn it in their first few minutes of stitching.
What is the difference between a running stitch and a back stitch?
The running stitch and back stitch both create a line, but the running stitch has evenly spaced gaps between each stitch, giving it a dashed appearance. The back stitch has no gaps — each new stitch connects to the end of the last, creating a solid, unbroken line. The back stitch is better for outlines and lettering; the running stitch suits borders and decorative details.
How long does it take to learn basic embroidery stitches?
Most beginners pick up all five basic embroidery stitches within a single session. The running stitch and back stitch typically click within minutes. The satin stitch and chain stitch take a little more practice to get even. The French knot is the trickiest of the five, but most people get a feel for it within one or two tries.