🖤 Back stitch is one of the most fundamental basic embroidery stitches and a key technique every embroidery for beginners enthusiast should master. If you’re new to embroidery, this back stitch tutorial will guide you through the steps to create a clean, crisp line perfect for outlines, lettering, and even filling spaces. The basic embroidery stitch is easy to learn, and you’ll be using it often as you dive deeper into the world of embroidery.
Think of it like the running stitch but with a twist—it removes the gaps and connects the stitches together. You can use it to create straight or curved lines, and it’s versatile enough to be stitched in any direction you choose. Whether you’re outlining a design or adding intricate details, this stitch will be a go-to tool in your embroidery kit.
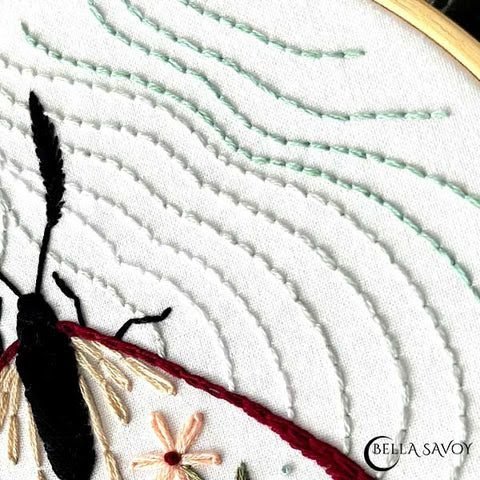
This stitch is widely used for outlining, filling in spaces, and adding texture to your designs. To fill a space, simply create a row of back stitches and then add another row right next to it. You can keep the stitch lengths uniform, stagger them for a brick-layer effect, or make them irregular for a more organic, textured look. Whatever style you choose, it will elevate your project with lovely detail and texture.
As the name suggests, the back stitch is formed by going back one stitch length to the end of the previous stitch. If that sounds confusing, don’t worry—just head down to the visual embroidery stitch tutorial below to see it in action. You’ll catch on quickly! At the end of this post, I’ll share some helpful tips to ensure your stitches come out looking perfectly neat. If you need extra guidance, I’ve also included a video tutorial for a more in-depth look at the technique.
Table of Contents
For more fun variations of this basic stitch, check out my other blog post with five easy tutorials. And yes, there’s a video to go with it, too!
Step-by-Step Back Stitch Tutorial
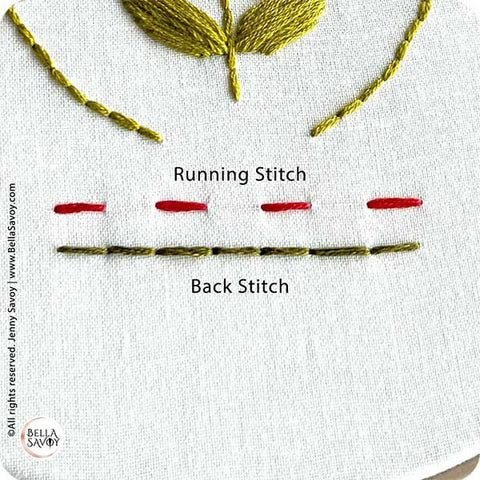
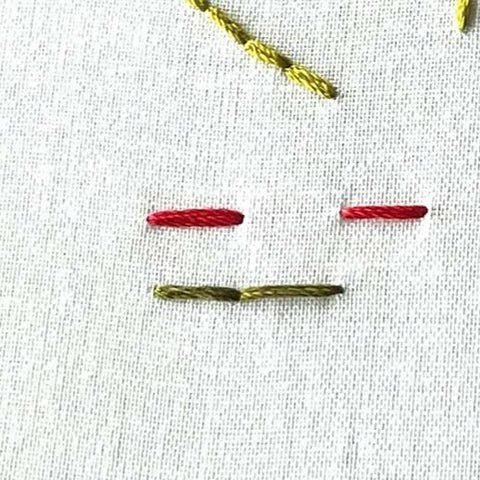
Here’s a comparison of the running stitch and back stitch. The back stitch looks somewhat similar to the running stitch, but without the gaps.
Start the back stitch the same way you would a running stitch, by adding one simple stitch. Come up one stitch length away, then go back to the end of your first stitch and return to the back. Then repeat this step until you’re happy. That’s all there is to it!

Tips and Tidbits
Here are some tips to help you make your stitch look as perfect as possible.
-
When you enter through a hole that already has thread in it, be careful that you don’t pierce through the thread which will separate it a bit and create a little bulb.
-
Each time to you create a new stitch try your best to line it up with the previous stitch. If it’s even slightly off it’ll be noticeable. You can push your needle partly through then pull it back out. You’ll be able to see the needle hole to tell if you’re off to the side or on center.
-
When creating curves or circles, try using smaller stitches so the end result will look much smoother. Larger stitches can create angles you may not want.
-
Take the time to correct any stitch that looks a bit wonky right away. Trying to fix it later will be difficult since you’ll have to remove stitches to do so. It’s easy to get a bit lazy about this, and I’ve been guilty of it at times, but it’ll make a different.
-
Engaging in cozy crafts like embroidery is a wonderful way to wind down your day, and it might just be the perfect activity to help you relax and enjoy a little stress relief before bed.
Take a few minutes to watch my video tutorial if you’d like, then head over to my embroidery tutorials for more!