Flower Embroidery Part 2
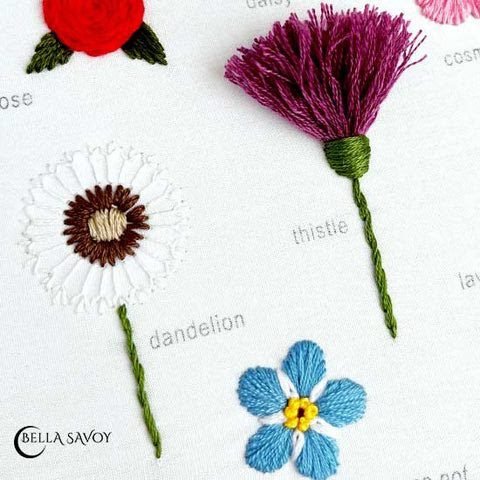
🖤 Welcome back to part 2 of the flower embroidery stitch along! In this next segment of the flower embroidery tutorial, you’ll learn how to embroider flowers like the dandelion, forget-me-not, and thistle. These flowers are a perfect addition to your growing embroidery skills, and if you missed part 1, be sure to check it out for the first four flowers we covered.
In part 1, we went over how to make the rose, daisy, cosmos, and lavender using the free flower template download I provided. Now, it’s time to move on to the next three flowers in this embroidery stitch along: the dandelion, forget-me-not, and thistle. Whether you’re joining us for the first time or following along from the beginning, this is a fun and relaxing way to improve your skills while creating something beautiful.
Throughout this flower embroidery tutorial, I’ll be guiding you through each step, showing you how to embroider flowers in simple, easy-to-follow techniques. Feel free to stitch with me as we tackle these new blooms together, and don’t forget to pause the video whenever you need a moment to catch up.
By the end of this stitch along, you’ll have completed a beautiful bouquet of flowers with a variety of stitches, and you’ll feel more confident in your embroidery skills. Let’s get started on this next phase of the journey and add even more lovely flowers to your embroidered collection!
Table of Contents
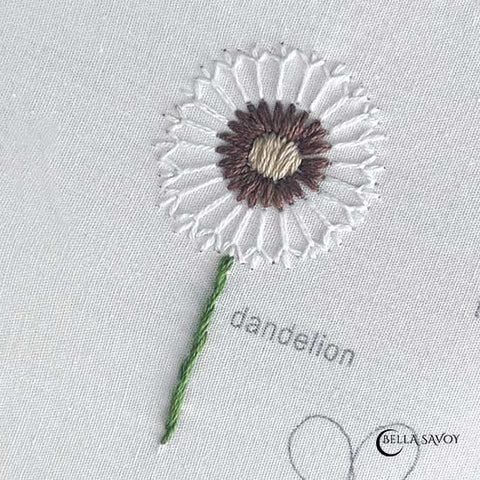
Dandelion Stitch Along
-
Thread colors: dmc #3346, #3782, #898, white
-
Stitches: stem stitch, satin stitch, seed stitch, fly stitch
Steps
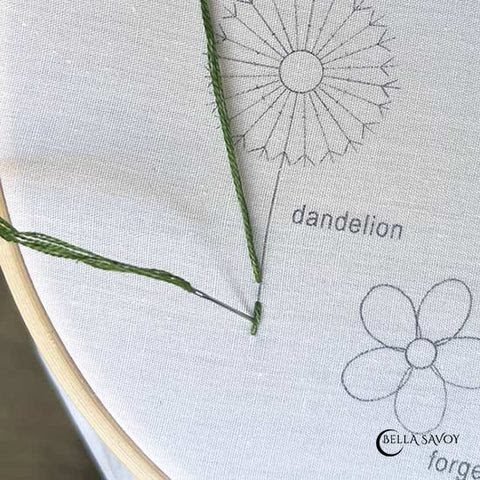
Create the stem using 6 strands of dmc #3346. Use the stem stitch:
-
Create a small stitch at the bottom of the stem.
-
Come up a gap away.
-
Return to the small stitch and nudge it over to the right with your needle and return to the back.
-
Continue steps to finish the stem.
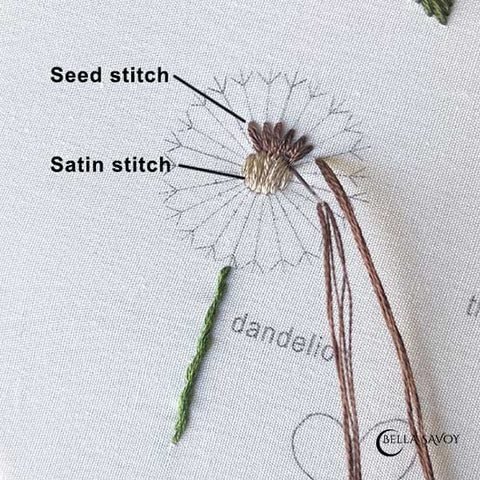
Stitch the center of the dandelion.
-
Use 6 strands of dmc #3782 and add the satin stitch in the center of the dandelion.
-
Use 6 strands of dmc #898 and use the seed stitch to create seeds around the center.
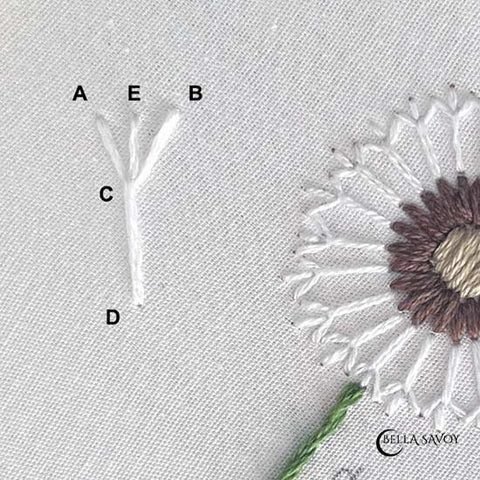
Make the pappus, (the fuzzy white part) with 2 strands of white using the fly stitch and a small seed stitch.
-
Come up at A then return to the back at B. Keep the stitch loose.
-
Come up at C and go over the loose stitch, then tighten to form a ‘V’ shape.
-
Return to the back at D. This should sit at the top of the small brown seeds.
-
Add a small seed stitch that goes from E to C.
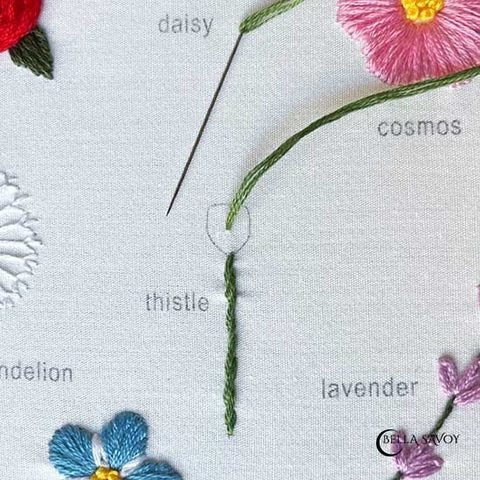
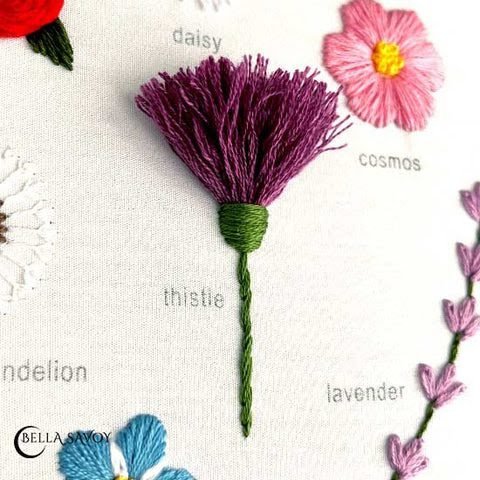
Thistle Stitch Along
-
Thread colors: dmc #3346 & #3835
-
Stitches: stem stitch & satin stitch
Steps
Create the stem with dmc #3346 using the stem stitch, just like we did with the lavender flower, only this time use 6 strands.
-
Start at the bottom and when you reach the top come back up to the top of the fabric in the middle of the flower receptacle, and set your needle down.
Make the petals with 6 strands of #3835
-
Wrap thread around 3 of your fingers (keep your fingers loose) 12 times & cut the end. The beginning and end of your thread should end up on opposite sides of your fingers.
-
Carefully remove thread from your fingers and center it on the bottom of your flower receptacle, below the thread you left behind earlier.
-
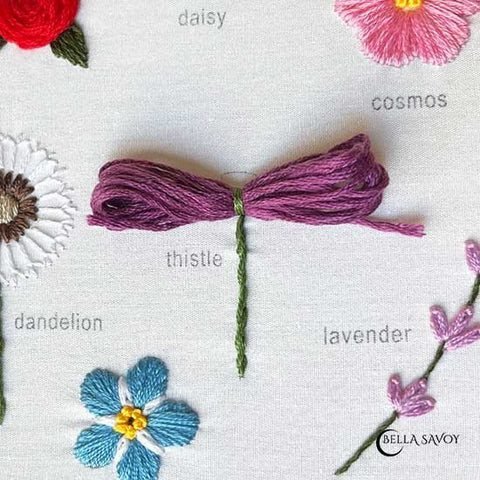
Take your needle and return to the back at the base of your flower receptacle to hold down the petals. It only needs to be done once or twice.
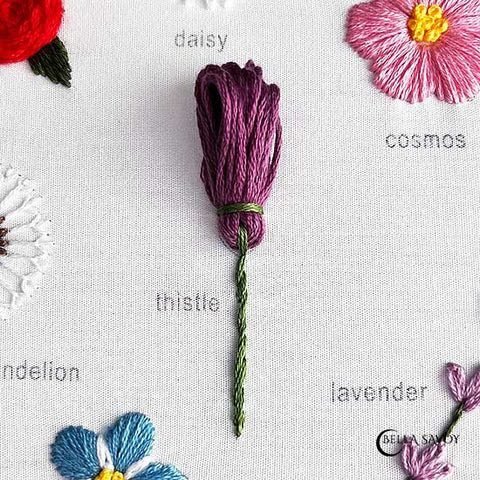
Make the flower receptacle using dmc #3346 with the satin stitch
-
Fold your petals up and add a stitch over the bunched thread where the top of the receptacle is.
-
Cover the receptacle using the satin stitch, and adjust as needed.
Create the petals.
-
Cut the loops and trim
-
Use your needle and finger to separate the strands
-
Fluff the strands.
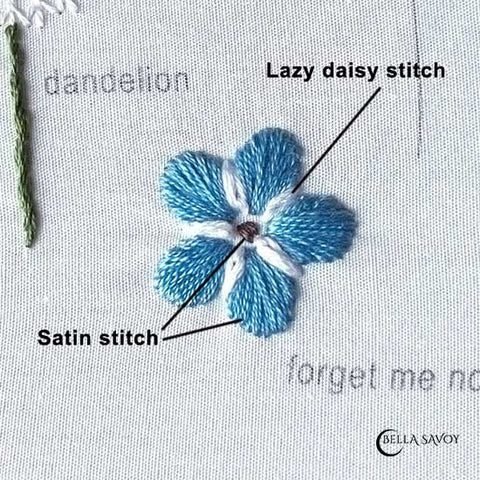
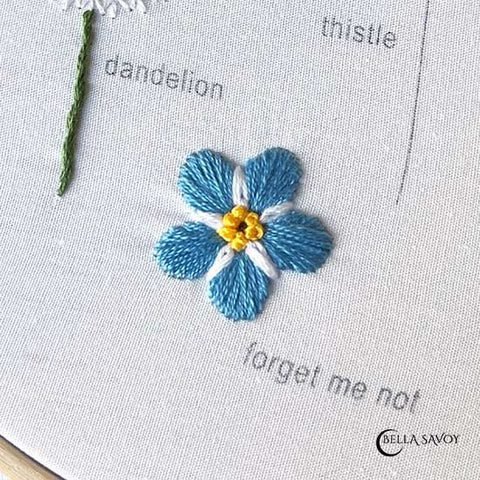
Forget-Me-Not Stitch Along
-
Thread colors: dmc #518, white, #898, and #743
-
Stitches: satin stitch, lazy daisy stitch, & french knot
Steps
Stitch the petals
-
Use 6 strands of dmc #518 to fill the petals with the satin stitch
-
Use 4 strands of dmc white and add a lazy daisy stitch. The top of the loop should point towards the center of the flower.
-
Add a small satin stitch in the center using 6 strands of #898. Leave a small gap between it and the petals.
-
Add 4 strand lazy daisy stitches with 1 wrap in that gap using dmc #743.
Now that you’ve completed the tutorial, take what you’ve learned and feel free to modify the stitches and colors to create your own personalized version. Think of these flower embroidery tutorials as a great starting point or “base,” and let your creativity shine as you add your own cozy touch! Whether you want to stitch along in one sitting or tackle one flower a day, this embroidery stitch along is the perfect way to enjoy some self-care time. Embroidery is a wonderful and relaxing way to unwind, and stitching flowers can bring a sense of peace and calm to your day.
If you ever need to review any of the stitches used for these flowers, don’t hesitate to visit the blog posts for more detailed instructions and videos. Take your time, and remember, this is all about enjoying the process and making something beautiful at your own pace.
Happy stitching, and I hope you feel cozy and relaxed as you add these flowers to your embroidery collection!