

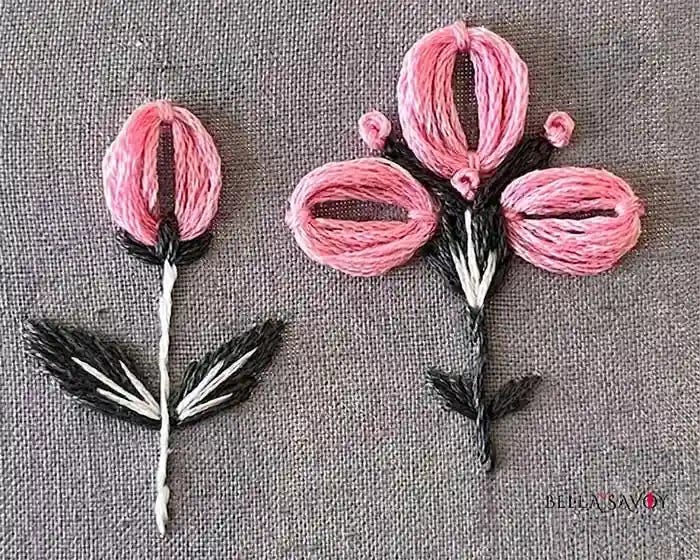
Learn how to add volume and texture with this petal stitch tutorial!
There are so many fun embroidery stitches to choose from to create your work and the one I want to focus on right now is the petal stitch which is pretty easy to make, even for beginners. It’s not among the list of basic embroidery stitches for beginners but if you’re just starting out don’t worry. You’ll learn it in no time!
The petal stitch is commonly used for flowers like daisies and pairs perfectly with the french knot which can be used for the center.
The petal stitch in some ways resembles a lazy daisy stitch, but they’re not really the same thing. They both utilize loops to form their shape and are perfect for creating flower petals, but the petal stitch uses more loops and adds a bit more volume.
Vary the size, colors, and layout to create a variety of designs. And if you stack them you can create an effect that looks similar to hair braids!
Disclosure: As an Amazon Associate, I earn from qualifying purchases at no extra cost to you.
Click here for a FREE EMBROIDERY PATTERN
Steps
To begin the petal stitch, create a small straight stitch, then come up next to it at the top (image 1). You’ll also see this being created with a loop, similar to the lazy daisy stitch. Both are equally fine.
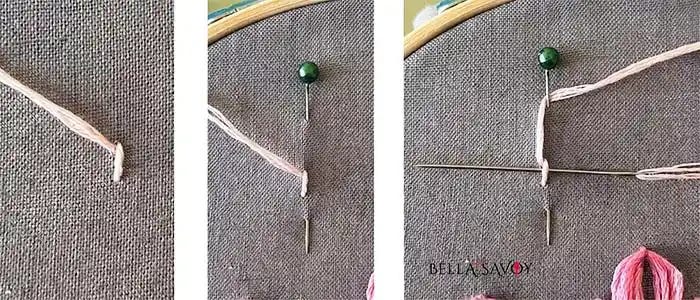
For the next step, use a straight pin, preferably with a large head. Place it around 1/2” or so above the straight stitch (image 2).
If you don’t have a straight pin you can also just add a small straight stitch where you want the top of your stitch to end. Make it loose enough so you can push your needle and thread through multiple times, but not too loose. The pin will make it easier so I recommend that route.
Next, wrap your thread around the back of the straight pin (or through the straight stitch) at the top, then push your needle and thread through the straight stitch you created in step 1. This will form your first loop.
Repeat step 3 until you’re happy with the volume.
As you go, adjust the loops so they sit nicely with each other. They should fatten up along the sides and once you like the thickness, tuck the end of the thread behind the top of the pin.
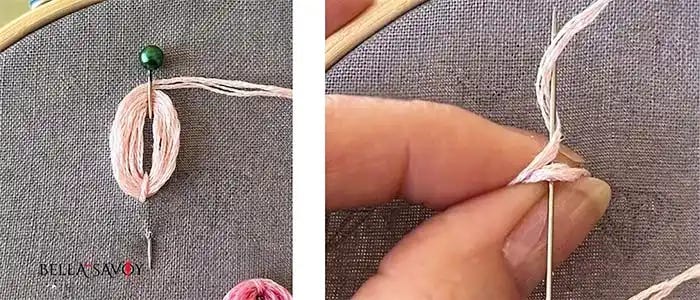
It’s time to secure the loops together at the top. If you used a small straight stitch, you can technically leave it that way and it would still look like a petal stitch. But the petal stitch involves a small knot at the top of the loops so here’s how to do that.
Slide your needle carefully through the loops, remove the pin, pinch the top with your fingers, and lift off the fabric carefully. Keep the needle through the loop.
Wrap the thread over and around the back of the needle then carefully pull it through to form a loose knot.
Before pulling the knot tight, take a look at the loops to make sure the knot will be centered and adjust if needed.
Set the loops against the fabric then push the needle through the fabric to secure the loops in place.
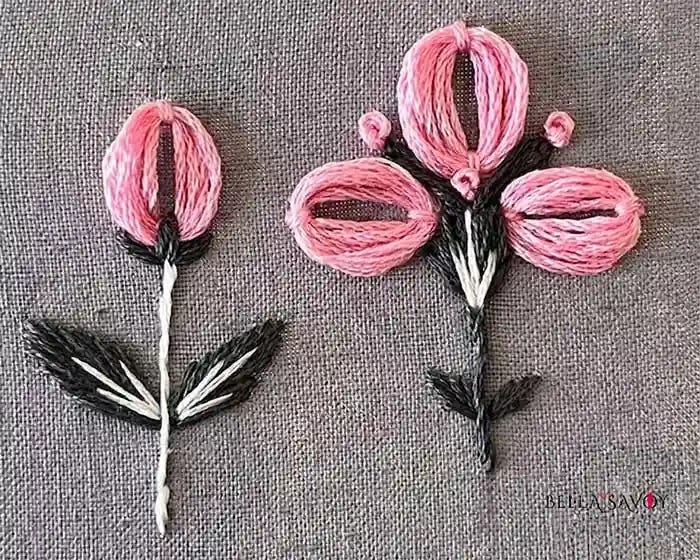
Tips
The petal stitch is a fairly easy stitch but it does take a bit of practice and here are some helpful tips to make it as perfect as possible.
Take your time.
Use at least 6 strands of thread to create the volume.
Make the straight stitch that holds the loops in place large enough to accommodate all the loops but not too large… this will take a little trial & error, but not much.
Be mindful of the tension you place on the loops. They shouldn’t be so tight that it pulls the fabric and it shouldn’t be so loose that the loops become sloppy.
When you are creating the knot, adjust the placement so it’s in the center of the loops before you tighten it.
Video: Petal Stitch Tutorial
When all is said and done, learning new things is usually easier when you can see someone else actually doing it, so take a minute to watch the video!
