🖤 This step-by-step pistil stitch tutorial will guide you through one of the easiest and most charming embroidery stitches. The pistil stitch is a simple yet effective way to add delicate floral details to your embroidery projects. It closely resembles the pistil of a flower, making it perfect for botanical and nature-inspired designs.
Whether you’re new to embroidery or looking to expand your skills, this stitch is a great addition to your repertoire. Follow this embroidery stitch tutorial for an easy breakdown, or skip ahead to the video tutorial for a visual demonstration.
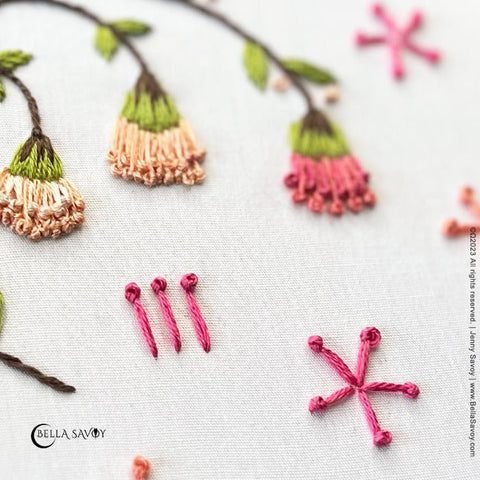
The pistil stitch is essentially a variation of the French knot combined with a straight stitch. It consists of two parts: a long, straight foundation and a tiny, textured knot sitting neatly on top. This combination creates a lovely raised effect, making it ideal for floral accents, delicate details, or even star-like embellishments. If you take a peek at the example photos above, you’ll see how versatile this stitch can be. You can use it individually for a minimalist design or stitch multiple together in a radial pattern to form a flower or star-like motif.
One of my favorite ways to use the pistil stitch is by combining it with other stitches to create unique floral textures. Try pairing it with the petal stitch for beautifully detailed flower petals, or scatter it across your design to add a whimsical, organic feel. The simplicity of this stitch makes it a great choice for mindful embroidery sessions—stitching can be a relaxing self-care activity that allows you to slow down and enjoy the creative process.
Ready to give it a try? Let’s dive into this pistil stitch tutorial and start stitching!
Table of Contents
Here’s how to make the pistil stitch.
Pistil Stitch Tutorial:
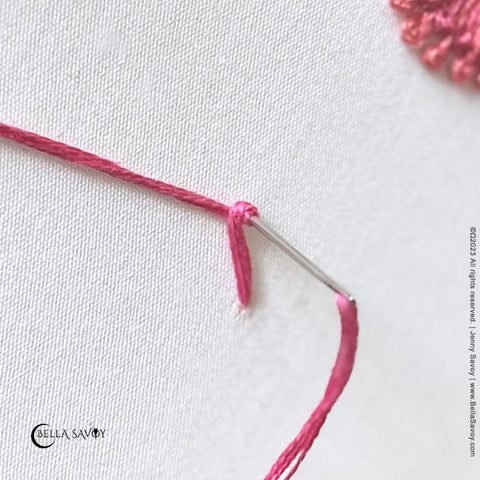
Step One
Come up to the top of your fabric and hold the needle in front of you.
Wrap your thread around the needle a couple of times. Obviously, the size of the bulb will vary depending on the number of wraps you use which is totally up to you.

Step Two
Next, push the needle halfway into the fabric with one hand and tighten the loose end of the thread with the other hand so the wraps gently hug the needle against the fabric.
It’s important to make sure the thread is nice and tight, but not so tight that you struggle in the next step.
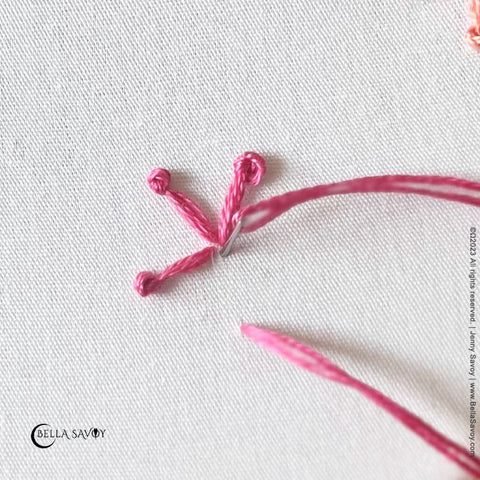
Step Three
Hold the loose end of the thread as you pull the needle and thread through to the back. Taking your time is the key to getting a nice pistil stitch. This can take a little practice so don’t feel bad if your stitch looks a bit wonky.
TIP: If you are struggling to get the stitch to look straight try this… before pulling the thread to the back, take a look at your thread and see which side you started wrapping around the needle. If it starts wrapping from the left, like it is in the photo above, hold the loose end of the thread on the same side, and vice versa.
I found that this will help straighten out the bulb so it sits right on top of the straight section. If your thread is too loose though, it won’t help so be sure you’re giving it the right amount of tension as you finish the stitch.

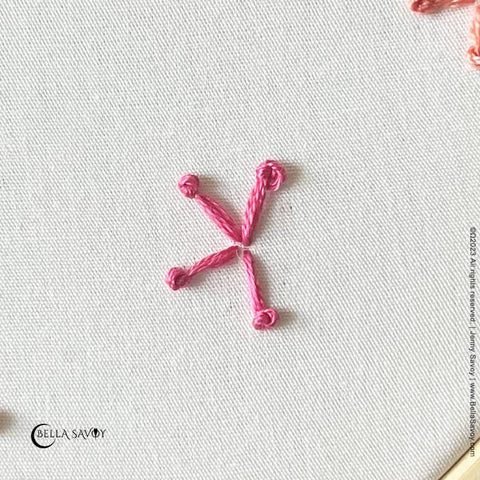
Alternative Method
If you haven’t already noticed, the pistil stitch is really a combination of the straight stitch and french knot so you can also create it using those two stitches. The method above cuts out a step and is a bit faster.
Simply create a straight stitch. Start it where you’d like the bulb to end up. So, in my flower below, I want the bulb to be on the outside so I’ll begin the straight stitch from there and return to the back at the center.
Then come up where you’d like to place the bulbous part and add a french knot.
The result looks just like the pistil stitch. That is it!
Video: Pistil Stitch Tutorial
As always, enjoy the video tutorial!