

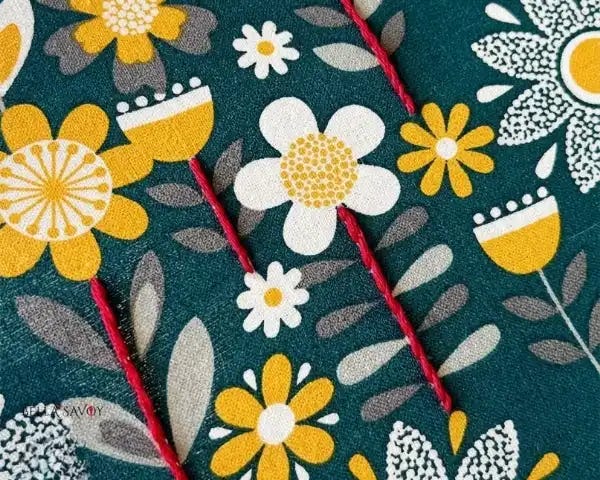
Learn how to stitch the stem stitch & outline stitch to create nice bold lines that have a rope-like twist and work beautifully for flower stems, vines, and so much more!
These basic embroidery stitches create a clean rope-like line, making them perfect for creating bold outlines and design elements like flower stems, vines, and leaves. These stitches provide a clean, smooth finish and are a great alternative to the chain stitch, which is also a popular outline stitch (and can double as a fill stitch) when you don’t want that typical chain look.
While mainly used for outlines, these stitches are also versatile enough to be used as fills, adding an interesting texture to your projects. Whether you’re working on a floral design or intricate patterns, the stem stitch and outline stitch help bring a unique depth and texture to your embroidery. These are essential for creating clean, crisp lines in your work, making them an excellent choice for any embroidery project you’re tackling!
These two stitches both twist and the difference is that they twist in opposite directions. The outline stitch twists to the left and the stem stitch twists to the right. The methods to creating them are also very similar, and there’s actually more than one way to make them. I started off with method 1 but now I mainly use method 2. Both are good to learn and I’ll show you two methods so you can try them both and decide which you like better.
Disclosure: As an Amazon Associate, I earn from qualifying purchases at no extra cost to you.
Click here for a FREE EMBROIDERY PATTERN
Outline Stitch
For both stitches I’ll work them in a vertical direction in this tutorial.
Method One
Draw a guideline running vertical if you’d like. This will be your stitch line.
Start with a loose stitch and set it to the left of your stitch line.
Come up between the loose stitch along the stitch line and pull the needle through.
You can tighten up your loose stitch first before pulling the needle all the way through if you’d like, but it’s an optional step.
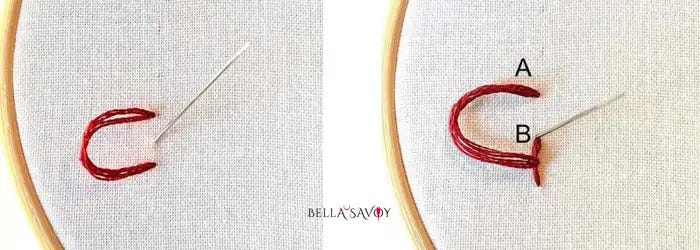
Next, return to the back a stitch length away (A) to create another loose stitch.
Set your loose stitch over to the left.
Then come up at the end of your previous stitch (B) and pull needle through.
Repeat steps and end your stitch by pushing your needle through the very end of your stitch. Notice how the outline stitch twists to the left.
Method Two
Method 2 reminds me a lot of the back stitch but when you go back you do so a little differently.
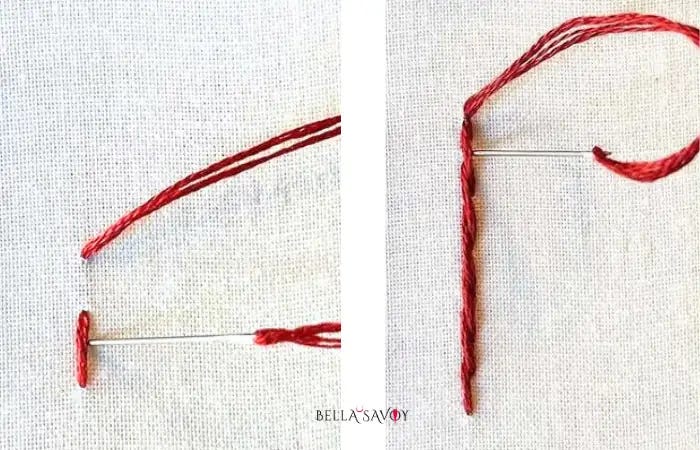
Start with a small stitch
Come up a stitch length away.
Nudge the previous stitch over to the left and return to the back along the stitch line.
Repeat steps then finish off the stitch by coming up at the very end of the stitch and returning to the back between the last stitch.
Stem Stitch
Method One
Again, I’ll make the stitch line run up and down.
Make a loose stitch along the vertical stitch line and push it aside to the right.
Bring the needle up in the middle of the stitch along the stitch line, then pull through.
Repeat and finish by returning to the back at the end of the stitch, just as it was done with the outline stitch.
Method Two
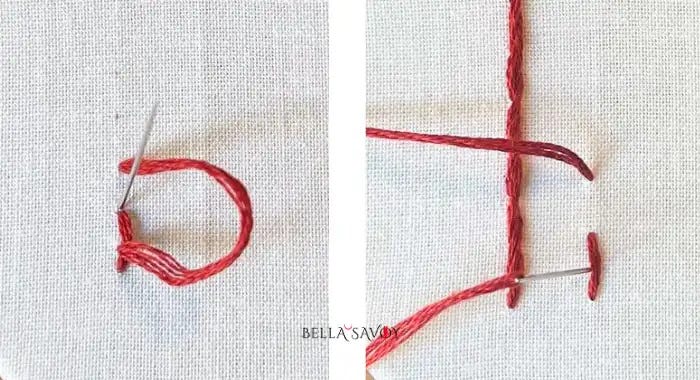
Make a small stitch.
Leave a small gap and come up.
Return to the middle of the previous stitch, nudge it over to the right and return to the back.
Repeat steps then finish off the stitch by coming up at the end of your stitch and return to the back between the last stitch, just like it was done in the outline stitch.
Comparing the Stem Stitch & Outline Stitch
Let’s compare the two stitches to help you remember the difference:
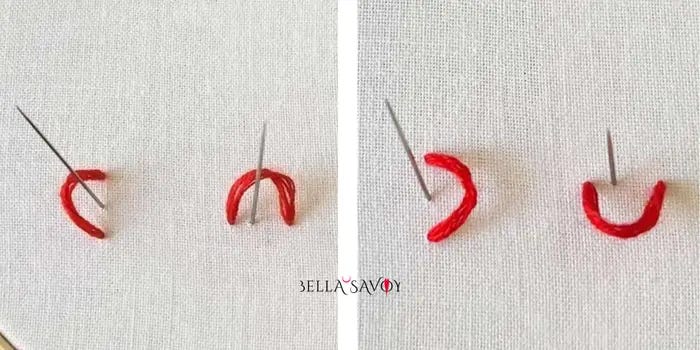
OUTLINE STITCH: your needle will always be to the right or below the thread.
STEM STITCH: your needle will always be to the left or above your thread.
Honestly though, both stitches are incredibly similar and you can use whichever you want. The only time I would pick one over the other is when you’re stitching a curve:
When stitching a curve, pick the stitch where the needle will be on the inside of the curve. Give this a try and see the difference for yourself. Simply draw a U-shaped arch. Use the stem stitch to stitch the entire thing and note which side looks smoother.
Tip: Use smaller stitches for curves for a much smoother result. This is pretty much true just about any stitch.
Video Tutorial
Follow along with my stem stitch and outline stitch video tutorial. Practice makes perfect!
