

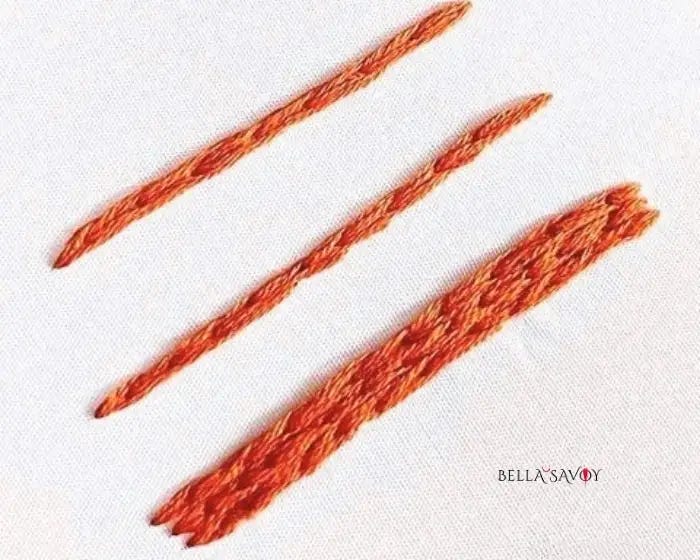
Split Stitch vs Split Back Stitch—what’s the difference? Learn how to create both embroidery stitches to make bold lines and textured fills in this easy embroidery stitch tutorial!
These two simple embroidery stitches look nearly identical. Even up close, it’s hard to tell them apart. You could argue that they’re basically the same stitch, and I’d agree!
But while they may look the same, there’s a key difference: one method uses significantly more thread than the other. This can impact not only the texture of your embroidery but also how much floss you go through in a project. Before we get into that, let me show you how to create them step by step in this stitch tutorial.
Both stitches have a braided appearance and start with a single straight stitch (also known as a seed stitch). Each following stitch loops back into the previous one—similar to a back stitch—but instead of following the outline, you split the thread right through the middle. This technique creates a beautiful, textured effect that works well for bold outlines and filled areas alike.
To keep both sides looking even, it’s important to use an even number of strands. I used six strands for this embroidery stitch tutorial, but you can adjust depending on your project. If you’re going for a delicate, fine line, try using fewer strands, while a thicker thread count will create a more pronounced, raised effect. Now, let’s get stitching!
Disclosure: As an Amazon Associate, I earn from qualifying purchases at no extra cost to you.
Click here for a FREE EMBROIDERY PATTERN
Split Stitch
Create a small stitch, then come up from below the fabric (1).
Split the small stitch in the middle & pull through (2).

If you need a little help splitting the stitch, try keeping the stitch slightly loose on top so you can easily separate the thread. Take a moment to ensure each side has the same number of strands before moving to the next step—this helps maintain an even, braided appearance. Then push your needle up between the split, right at the end of the previous stitch.
Continue repeating these steps, focusing on keeping your stitch length and spacing consistent.
To end your stitch, you’ll want to come up through the middle of your very last stitch. Then push your needle through at the very end of your stitch.
The more you practice, the more natural it will feel. This stitch creates a beautiful, textured effect that works wonderfully for bold outlines, curved details, and even filling in shapes. Whether you’re outlining a floral design or adding texture to lettering, this technique is a great addition to your embroidery skills!
Split Back Stitch
Where the split stitch approaches the previous stitch from below the fabric, the split back stitch approaches the previous stitch from above the fabric. This slight difference in technique changes the way the stitch forms but still creates a similar braided effect.
To begin, create one straight stitch.
Then bring your needle up a stitch length away. Instead of splitting the stitch from underneath, use your needle to carefully separate the thread down the middle of the previous stitch from the top (4).

Once your needle is positioned in the center of the stitch, push it through and return to the back of the fabric. Make sure to keep your stitches evenly spaced and your tension consistent.
Then, repeat these steps, always splitting the previous stitch from above, until you reach your desired length.
To end the stitch, come up at the very end of your stitch, then push your needle through the middle of the very last stitch.
While both stitches look nearly identical, practicing them side by side will help you notice subtle differences in texture and feel. Over time, you’ll develop a preference based on how they work with different fabrics and thread types!
Which Uses More Thread?
Turn your embroidery hoop over and you’ll notice a big difference. The split stitch is on top & split back stitch is on the bottom.
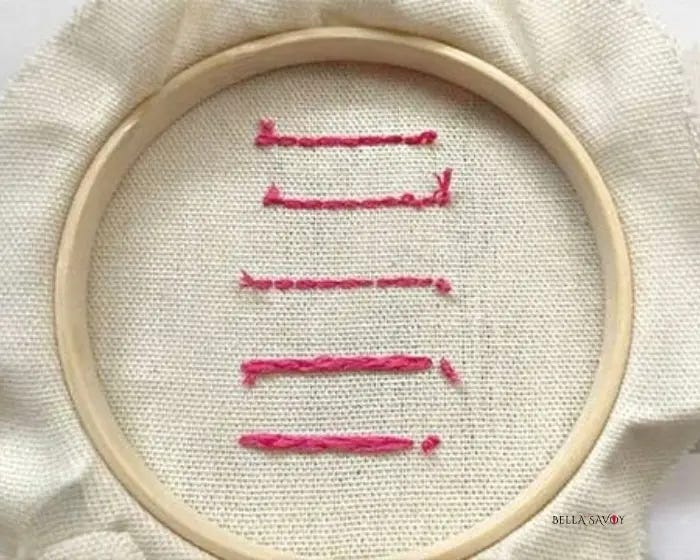
It’s easier to split the thread down the middle using the split back stitch, but it uses a lot more thread. If you’re short on a specific color that you need you can opt to use the split stitch.
Each stitch can create some really nice lines, thick and thin, and I like them both but I do use the back split stitch more. Try them and see what you think!
Video Tutorial
Be sure to take a peek are more embroidery stitch tutorials and add more to your stitching toolbox!
Happy stitching!
