

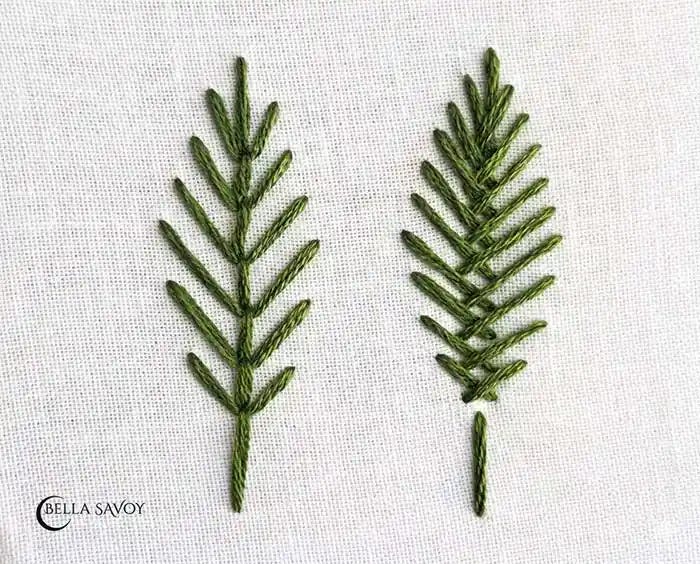
There are countless ways to embroider leaves, and here, we’re going to focus on using the open fill stitch technique to fill the space within a leaf design. This fill technique leaves some areas open, allowing the fabric beneath to show through, which creates a light, airy feel in your embroidery.
This technique differs from a closed fill stitch, which fills the space completely with stitches. You can choose to outline the shape of the leaf first, or leave it open, depending on the effect you want to achieve.
In this embroidery stitch tutorial, you’ll learn how to use the fly stitch and fishbone stitch as the basis for your open fill stitch, but you can use any stitch to make an open fill.
These stitches are easy to learn and perfect for beginners. Using 4 – 6 strands of thread, you’ll be able to create beautiful, textured leaves and other design elements with this technique.
Disclosure: As an Amazon Associate, I earn from qualifying purchases at no extra cost to you.
Click here for a FREE EMBROIDERY PATTERN
Open Fill Stitch Using the Fly Stitch
Add a Leaf Tip: Start by drawing a leaf template and add a spine down the center.
To make your leaf with an open fill fly stitch. Start by adding a simple straight stitch at the top along the spine so your leaf has a nice point.
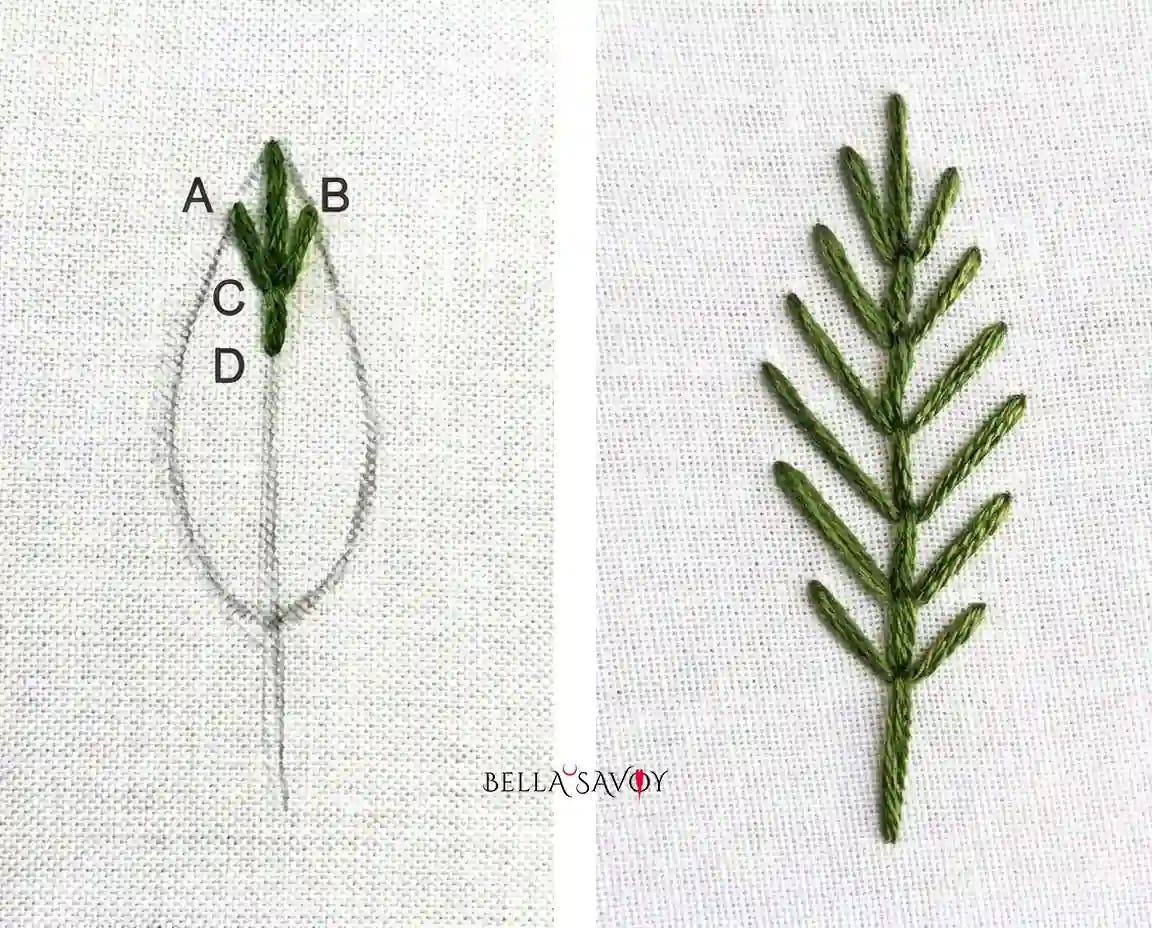
Next, you’ll simply add a long-tail fly stitch all the way down the leaf. Using the long tail will make adding space easy-peasy: Start by creating an open loop near the top of the leaf, just slightly away from the tip. (A to B) Keep the loop relaxed but not too loose, as this will help shape the final design.
Next, bring your needle up at the bottom of the straight stitch (C), ensuring your needle comes up over the loop you’ve formed. This placement is key to securing the stitch while maintaining the open effect.
Pull the needle through carefully.
Return to the back along the spine a small distance away from C.
Repeat all the way down the leaf, keeping your stitches evenly spaced for a balanced look. Add a stem if you’d like, using a simple back stitch or stem stitch for a delicate touch.
If you prefer, you can tighten your loop first so it gently hugs your needle before pulling the thread all the way through. This step gives you a bit more control and helps create a more defined and neat look for your stitch, giving your leaf a clean, textured finish.
Experiment with different stitch lengths and spacing to achieve a variety of effects, whether you want a delicate, wispy look or a more structured, bold design.
Open Fill Stitch Using the Fishbone Stitch
To create an open fill stitch using the fishbone stitch, start the same way by adding a single stitch along the spine at the tip.
Where the long tailed fly stitch creates “Y” shapes, the fishbone stitch creates more of an “X” shape.
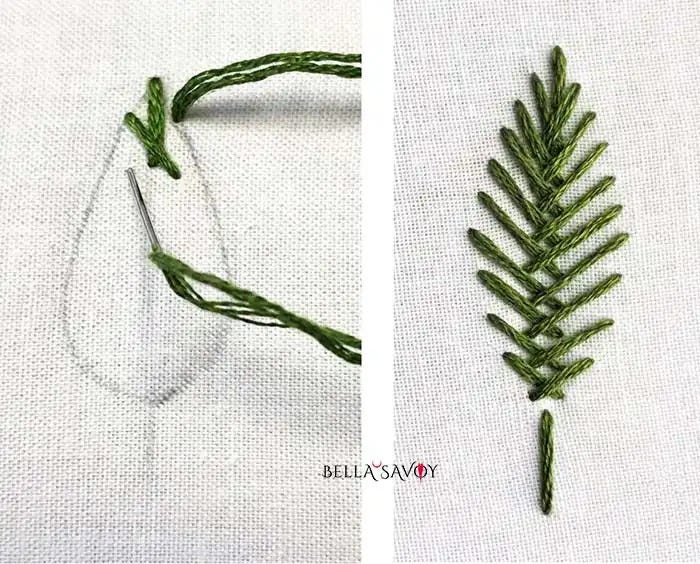
Start the same way as it was done with the fly stitch by adding a straight stitch at the top of your leaf, along the spine.
Come up along the edge of your leaf a small gap away from the leaf tip.
Then cross over your spine and return to the back slightly lower than your straight stitch.
Do the same on the other side.
To keep this an open fill, leave a small gap between each fishbone stitch as you repeat them down your leaf.
Add a straight stitch to create the stem.
As we compare, both stitches create beautiful, textured effects, but they each bring something unique to the design. The fly stitch offers a more structured, delicate look, while the fishbone stitch adds a fuller, more defined appearance to the leaf.
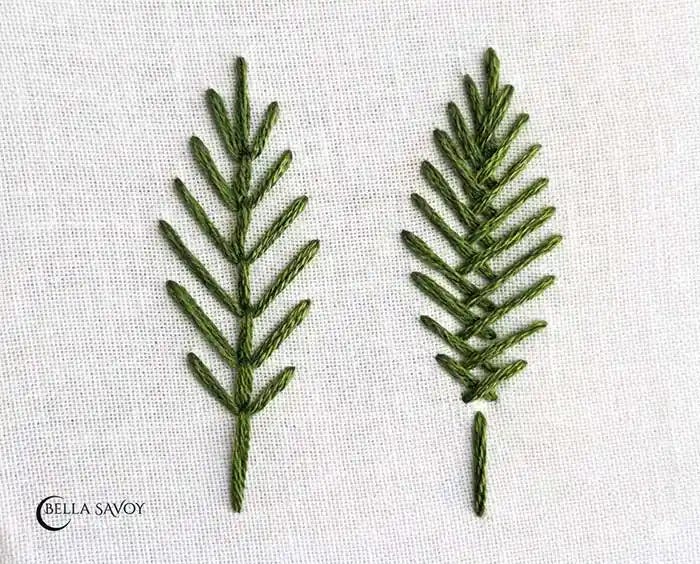
By experimenting with both, you can see how they differ in their ability to fill space while maintaining an open, airy feel. Both are perfect for enhancing your floral embroidery designs!
If you want to add an outline (which is optional), try adding a simple back stitch for a clean, finished look. This can help define the edges and make your design stand out even more. A single outline works beautifully, but you can also experiment with a double outline or even a contrasting color for extra depth.
The same technique can be used to create delicate details like arrow quills, pine needles, or even fish bones. In these cases, the stitches act more as decorative lines rather than a traditional fill, but the approach remains the same. Play around with different stitch lengths and spacing to achieve the effect you’re looking for.
Embroidery is such a wonderful way to unwind, spark creativity, and bring beautiful designs to life. Whether you’re filling in a shape or using these stitches for fine details, there are endless ways to get creative.
I hope you enjoyed this embroidery stitch and the video tutorial below. Next time you’re enjoying this cozy hobby, grab your favorite drink, relax, and give this technique a try!
Video Tutorial
