

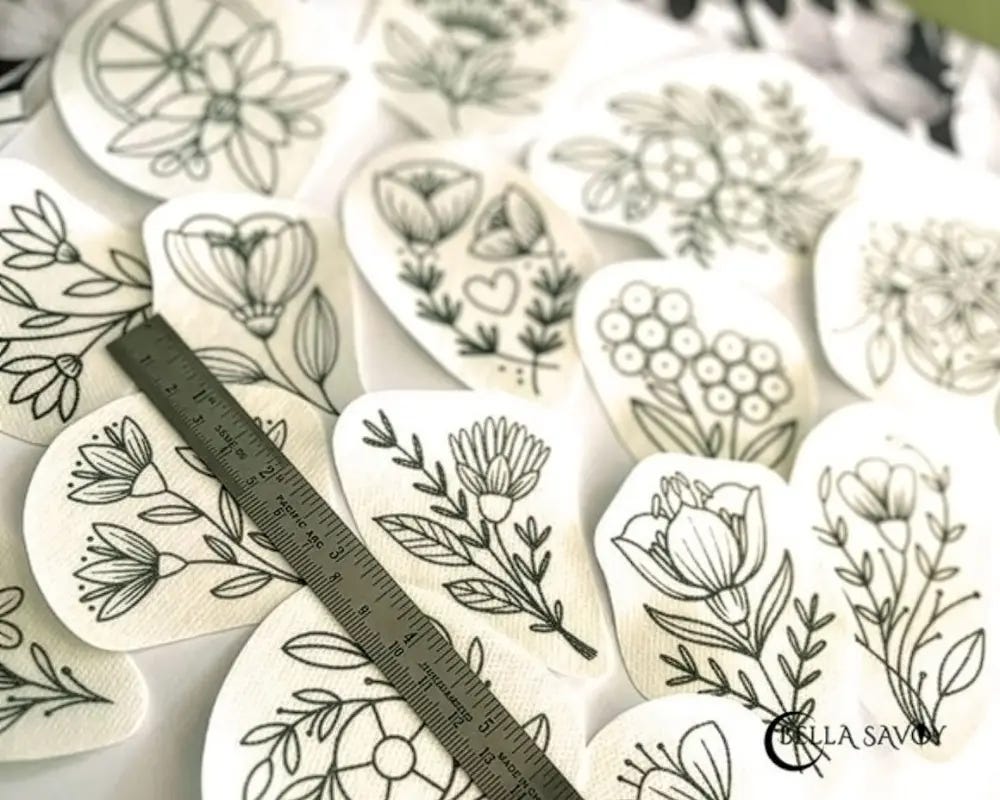
If you’ve ever wanted a simpler, cleaner way to transfer embroidery designs onto fabric, stick and stitch is the method that will change how you approach every single project.
Stitching is the fun part—but if you’re like me, transferring embroidery patterns can feel like a bit of a hassle, especially when you’re eager to jump right into a cozy craft session. Tracing detailed designs can strain your eyes and take more time than you’d like.
That’s why I put together a post covering several embroidery transfer techniques, including my favourite method: using sticker paper with my home printer. In that post, I also briefly mentioned stick and stitch paper—a dissolvable stabilizer that makes transferring embroidery designs even easier.
What is Stick and Stitch?
Stick and stitch is a water-soluble stabilizer with a peel-and-stick backing. You print or draw an embroidery design directly onto the sheet, stick it onto your fabric, stitch through it, and dissolve it away with warm water when you’re done. It’s one of the quickest and most accurate embroidery transfer techniques available, with no tracing required.
I use this method all the time to make my own stick and stitch embroidery stickers, which I sell as themed kits in my Etsy shop—so I know this process inside and out. Since it’s worked so well for me, I wanted to share the entire process with you, from supplies to steps to the tips I’ve picked up along the way.
Whether you’re exploring embroidery for the first time or looking to level up your projects, you’ll find everything you need here to get started. If you’re just beginning your journey and want more guidance, visit the beginner embroidery basics category.
Disclosure: As an Amazon Associate, I earn from qualifying purchases at no extra cost to you.
Click here for a FREE EMBROIDERY PATTERN
What are Embroidery Stickers
Stick and stitch embroidery stickers are thin sheets of water-soluble stabilizer with a sticky back. You print or draw your design directly onto the surface, peel and stick it onto your fabric, stitch through it, and dissolve it away with water when you’re done. No tracing, no mess, no guesswork.
You might also hear them called sticky stabilizer or water-soluble stabilizer—they’re all the same thing.
There are two main types: tear-away and water-soluble. I personally only use the dissolvable kind. Tear-away versions work okay for simple patterns, but they often leave behind rough edges that are hard to remove. Water-soluble is cleaner, more polished, and far more satisfying to work with. Just make sure to keep the sheets away from moisture while you’re working!
The Supplies You’ll Need
Before you dive in, here’s what I use to make my stick and stitch embroidery stickers:
Water-soluble stabilizer sheets — I use and love New Brothread’s Sticky Stabilizer. After trying several brands over the years, their precut sheets are my absolute favourite. They feed through the printer cleanly, stick beautifully, and dissolve without leaving any residue.
A printer — I used to recommend only an inkjet printer because I believed it’s less likely to smudge. But guess what? I’ve learned that an inkjet printer works just as well with a few simple practices… I’ll share that down below.
Sharp embroidery scissors
Rubbing alcohol and cotton balls — for keeping your scissors and needle clean mid-project
Your usual embroidery supplies — hoop, needle, floss, and fabric
4 Steps to Make Stick and Stitch Embroidery Stickers
Ready to get stitching? Here’s the full process from start to finish.
Step 1: Prepare your design
Start with a digital design or sketch one out by hand. If you’re printing, set your design to the exact size you want it to appear on your fabric before you do anything else.
Step 2: Do a test run before touching your stabilizer sheet
Whether you’re printing or drawing your design by hand, always test before committing to a sheet. If you’re printing, run your design on regular paper first to check the size and catch any mistakes — stick and stitch sheets can be pricey, so this one step can save you both money and frustration.
If you’re drawing by hand, test your pen or marker in the corner of the sheet or on a scrap piece to make sure the ink doesn’t bleed when it hits water. A small test now saves a ruined project later.
Step 3: Print or draw onto your stabilizer sheet
Once you’re happy with your test, load your stick and stitch sheet into the printer and print your design. If you’re using an inkjet printer, allow the sheet to dry completely before handling—wet ink can smear and transfer onto your fabric.
Step 4: Cut out your designs
Use sharp scissors to cut around each design, leaving a small border. The sticky backing builds up on scissor blades quickly, so keep your rubbing alcohol and cotton balls nearby and wipe the blades regularly.
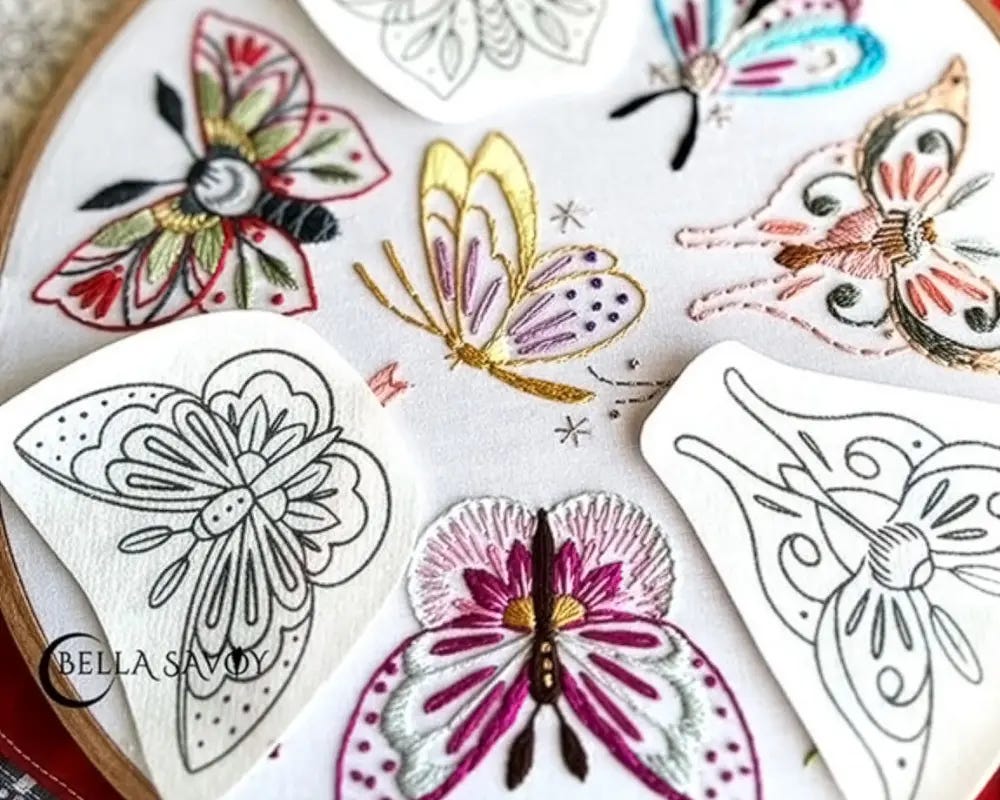
You now have a set of stick and stitch transfer stickers! Now to use it, all you have to do is peel away the backing and press the sticker firmly onto your fabric. Smooth out any air bubbles as you go, working from the centre outward.
Then stitch directly through the stabilizer and fabric together—the design lines are right there, no slipping or guessing.
Once you’re done, soak your project in warm water. The stabilizer will dissolve away, leaving your embroidery clean and beautiful. Rinse gently until all traces are gone, then lay flat to dry.
Tips for Making Stick and Stitch Embroidery Stickers
Over the years I’ve picked up quite a few tricks that have made this process so much smoother — and I’ve put together a dedicated post with even more stick and stitch tips right here if you want to go deeper. But here are my essentials to get you started.
Separate the sheets before printing.
They can stick together at the edges and jam your printer. A quick gentle peel before loading saves a lot of frustration.
Use small margins.
I use 0.25-inch margins to fit more designs per page and get the most out of each sheet. But .5 inches is the standard that most people prefer.
Tips for an inkjet printer.
The inkjet printer I use is the Epson Eco-tank. I used a Brothers laser printer for years but I switched about 2 years ago once I realized my inkjet printer did as beautiful a job as my Brothers. I also needed the extra space in my workspace. But, there are a couple of tips you’ll need to make sure your print comes out perfectly:
Print on the standard or draft setting to use less ink. If you use the best setting it will use extra ink that will bleed and smudge. Standard looks great and I have no issues with it.
Let your sheet dry for at least 5 minutes before you cut into it, and lay it flat.
By the way, the ink for my Epson Eco-tank keeps giving and giving! I’ve only had to refill the ink colors once in the past 2 years. I love and highly recomnend it!
Clean your scissors and needle regularly.
The sticky backing builds up on both. Keep rubbing alcohol and cotton balls close, wipe them clean as you go, and let them dry before cutting again.
Avoid lotion on your fingers.
It likely won’t dissolve the paper, but it can leave a residue that affects how well the sticker adheres to your fabric.
Store sheets carefully.
Keep them in their original packaging and well away from drinks and spills. If I’m at a busy table, drinks go on a completely separate surface.
Manage humidity.
If you live somewhere humid, a small fan or dehumidifier nearby can keep your sheets dry and crisp while you work — something worth knowing as you build out your embroidery transfer techniques toolkit.
Pros and Cons of Stick and Stitch
Not sure if this method is right for you? Here’s an honest breakdown.
Pros
Convenience. Just peel, stick, and stitch. No tracing, no complicated transfers — it’s one of the most beginner-friendly embroidery transfer techniques out there, and it makes embroidery for beginners so much less intimidating.
Precise transfer. You get crisp, clean lines and professional-looking results every time.
Fully customisable. Easily turn your own sketches or digital artwork into embroidery designs. It’s a brilliant tool if you want to embroider original patterns rather than working from a kit.
Saves your fabric. No permanent ink marks, no tracing errors, no ruined fabric.
Clean finish. Stick, stitch, dissolve in warm water — it rinses away completely. Perfect for delicate projects and anything that will be washed.
Cons
Can be pricey. Stick and stitch paper is a consumable, so costs add up if you use a lot. That said, if you’re working with multiple small designs per sheet, you can get excellent value from each one.
Update: Over the years, more brands have put out their version of sticky stabilizer. So, if you find one you like then stick with it (like the pun?). For me, I am really happy with Brothread brand.
Not reusable. Each sheet is single-use, so you’ll always need to restock. Worth factoring into your craft budget.
Sticky scissors and needle. You’ll need to clean your tools regularly throughout a session — rubbing alcohol makes this quick and easy.
Sensitive to moisture. Water-soluble stabilizer can dissolve or warp if it encounters humidity, spills, or damp hands. Handle with care.
Frequently Asked Questions
Does stick and stitch work on clothing?
Yes — stick and stitch is one of the best methods for embroidering on clothing. Sticking the design directly onto fabric means no tracing through layers, and the stabilizer supports stretchy or thin fabrics like sweatshirts while you stitch. Dissolve it away with warm water when you’re done.
Will stick and stitch dissolve completely, or does it leave residue?
Stick and stitch dissolves fully in warm water, though you may notice slight stiffness or faint residue after the first soak — this is normal. Rinse again, gently rubbing any stubborn areas under running water. A 3-5 minute soak is usually enough. Lay flat to dry rather than wringing or tumble drying.
Can I use stick and stitch on dark fabric?
Yes, though printed lines can be harder to see on very dark fabric. The best workaround is to keep your design lines bold and chunky so they’re easy to follow, or trace over the printed lines with a white gel pen before stitching. The stabilizer itself sticks to any fabric colour without issue.
Why does my needle get sticky when using stick and stitch?
Needle stickiness happens when the adhesive on the stabilizer activates from the warmth of your hands or a humid workspace. Wipe your needle clean with a little rubbing alcohol and continue stitching. Keeping your work area cool and dry helps prevent it from happening as often.
Is Stick and Stitch Right for You?
Making your own stick and stitch embroidery stickers is one of those cozy craft discoveries that genuinely makes embroidery more enjoyable — and once you try it, it’s hard to go back to tracing.
Whether you’re creating designs just for yourself, putting together handmade gifts, or dreaming of selling your own patterns like I do, the process is rewarding from start to finish. And if you’re ready to dive into embroidery for beginners more broadly, don’t forget to browse the beginner resources here — there’s plenty there to help you find your feet and your favourite methods.
If you decide to try New Brothread’s Sticky Stabilizer or any other supplies through my affiliate links, there’s no extra cost to you — it’s just a lovely way to support this small business. And if you’d rather skip straight to stitching, my ready-to-use stick and stitch kits on Etsy are always there waiting for you.
Happy stitching!