

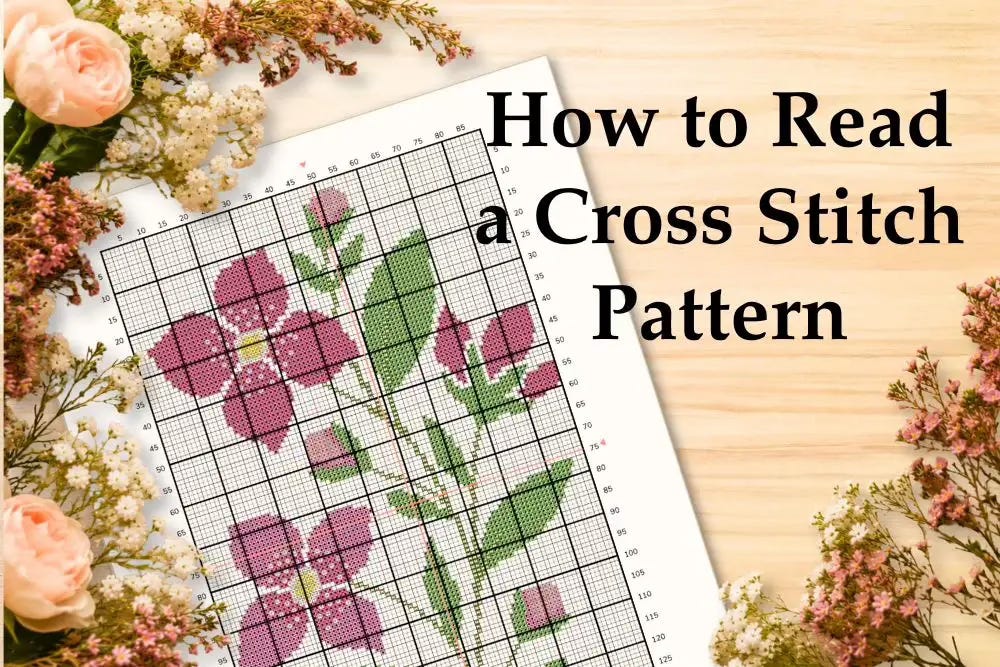
If you’ve never used a cross stitch pattern before, a chart can look a little confusing at first. All those little squares and symbols might seem like a secret code—but once you understand what you’re looking at, reading a cross stitch pattern is actually quite simple.
Think of the pattern as a map. The cross stitch chart shows you where to stitch, while the pattern key tells you what each symbol means. Once you understand how those two pieces work together, you’re ready to start stitching.
Don’t forget to read the following posts before you dive into this one: Simple Cross Stitch Guide for Beginners and Cross Stitch Fabric for Beginners: Understanding Aida Count.
Disclosure: As an Amazon Associate, I earn from qualifying purchases at no extra cost to you.
Understanding a Cross Stitch Pattern Chart
The main part of your pattern is the chart. You’ll see a collection of squares containing different symbols, with each symbol representing a particular thread color.
For example, you might see a small circle in one square and a triangle in another. The pattern key tells you which thread color corresponds to each symbol.
You’ll also usually see numbers along the top and side of the chart, along with darker grid lines dividing the design into larger sections.
Let’s take a closer look at what all of these elements mean.
What Do the Grid Lines and Numbers Mean?
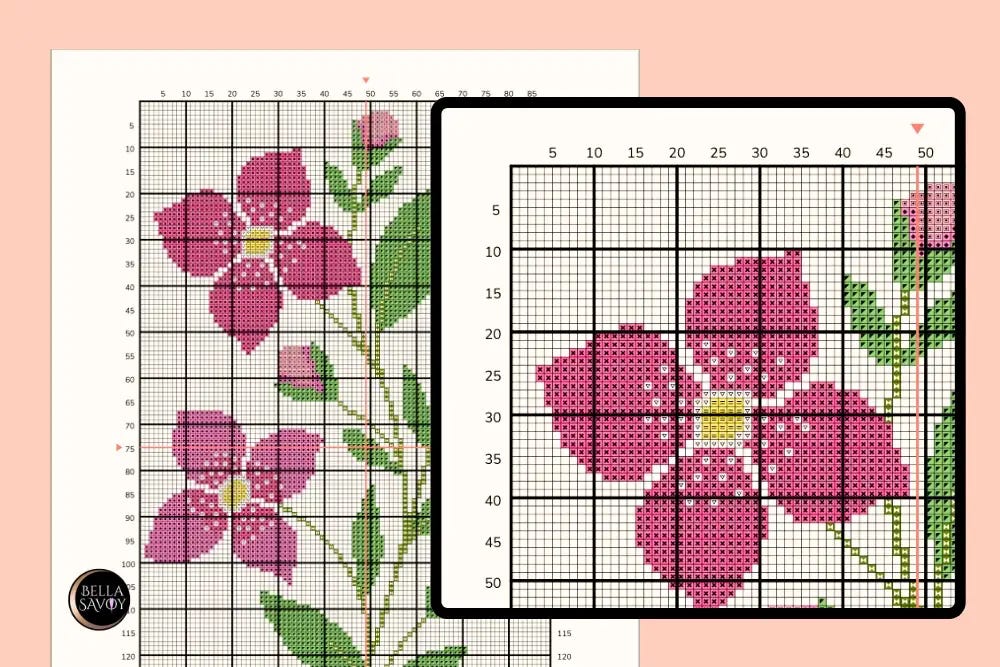
The darker lines running through the chart are grid lines. They usually divide the pattern into groups of 10 squares, making it easier to count stitches and keep your place.
They don’t represent extra stitches—you can simply use them as landmarks while you’re following the chart.
You’ll also notice numbers along the top and side of the pattern. These indicate the stitch count and help you find a particular area of the design, especially when you’re working on a larger pattern.
Think of the grid lines and numbers as little landmarks that help you find your way around the chart.
What Do the Symbols Mean?
The symbols inside the squares represent the different thread colors used in the design.
To figure out which color you need, find the symbol on your chart and then look for that same symbol in the pattern key. The key will tell you the corresponding thread brand, color name, and color number.
Once you get used to matching the symbols to the key, reading a cross stitch chart becomes much easier.
Understanding the Cross Stitch Pattern Key
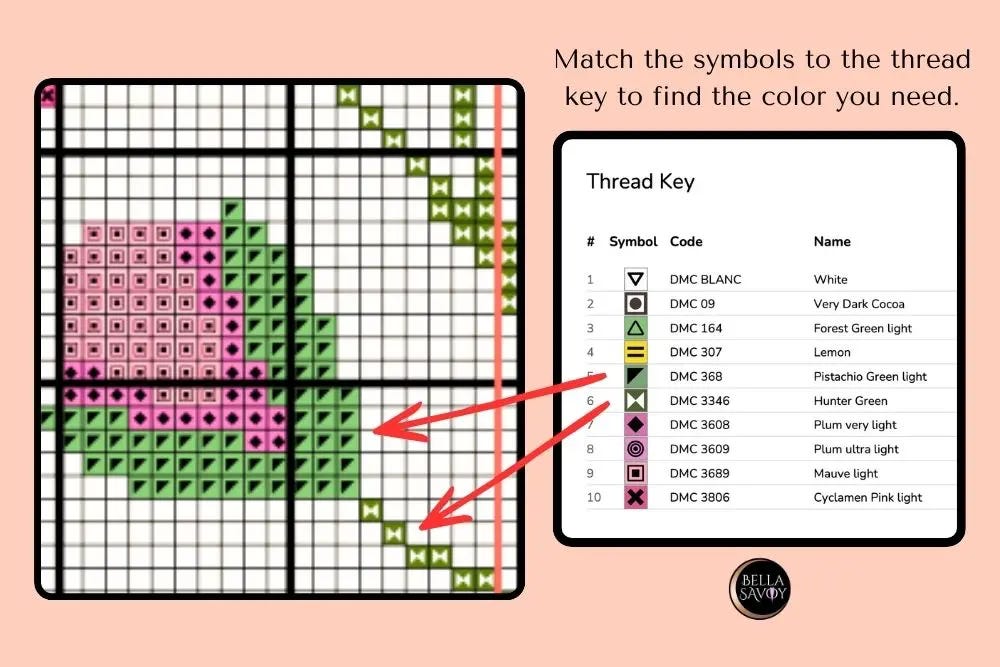
The pattern key is your reference guide for the chart. It explains what each symbol means and tells you which thread color to use.
A pattern key typically includes:
The symbol used on the chart
The corresponding thread color
The thread brand and color number
Sometimes the type of stitch represented by the symbol
Some patterns include a color chart, a black-and-white symbol chart, or both. These charts show the same design in different ways, so you can use whichever version is easiest for you to follow.
If you’re using a black-and-white chart, don’t worry if it looks a little different from a color chart. The symbols are what matter. Simply match the symbol on the chart to the same symbol in the key.
How to Find the Center of a Cross Stitch Pattern
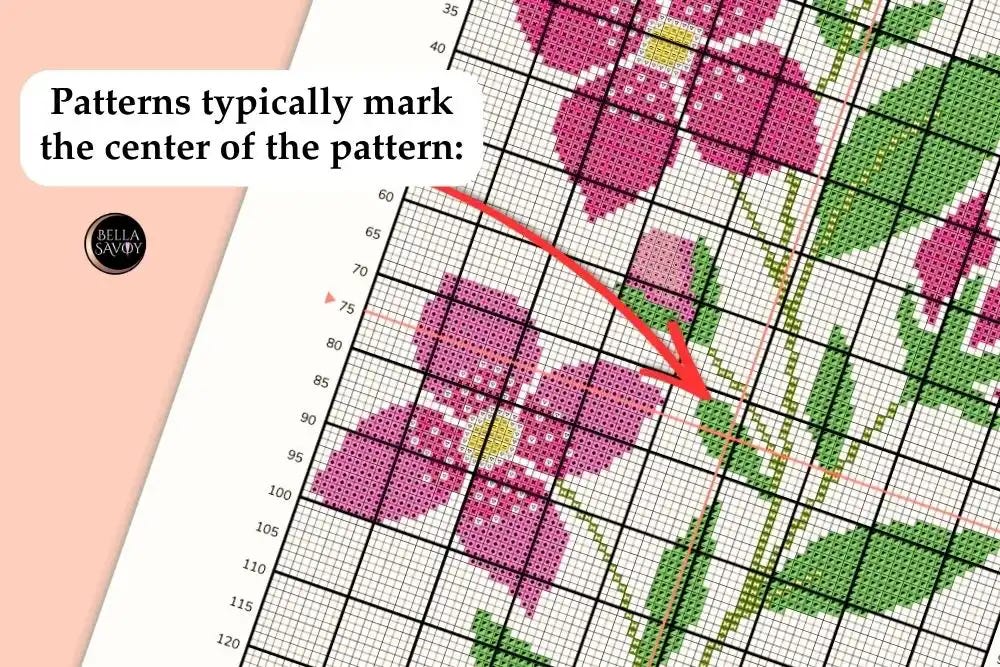
Many cross stitchers start stitching from the center of the pattern. This is a popular method for beginners because it makes it easier to position the finished design on your fabric.
Most patterns will indicate the center of the chart with intersecting lines, arrows, or another clear marker.
You’ll also want to find the center of your fabric. To do this, gently fold the fabric in half in one direction and then in half in the other direction. The point where the folds meet is the center.
From there, you can match the center of your fabric to the center of your pattern and begin stitching.
You don’t have to start in the center, but it’s a simple method that can help prevent your design from ending up too close to one edge of the fabric.
How to Follow a Cross Stitch Pattern
Once you’ve found your starting point, you’re ready to begin stitching.
Instead of trying to understand the entire design at once, choose a small section of the chart and work through it one area at a time.
Here’s a simple way to follow your pattern:
Find the section of the chart you’re ready to stitch.
Choose a symbol in that section.
Check the pattern key to find the corresponding thread color.
Locate that symbol on your fabric.
Stitch the corresponding square.
Continue working through the section, checking the chart as you go.
You don’t need to memorize the pattern. The chart is there to guide you, so it’s completely normal to look back and forth between the chart and your stitching.
As you become more comfortable, you’ll develop your own way of working through a pattern. Some stitchers work one color at a time, while others stitch one small area at a time.
There isn’t one right way to follow a cross stitch chart. Choose the method that makes the pattern easiest for you to see and follow.
How to Keep Your Place on a Cross Stitch Chart
Keeping track of where you are becomes especially important when you’re working on a larger design.
If you’re using a printed pattern, you can use a pencil or highlighter to mark the area you’ve already completed. Some stitchers also use a magnetic board or ruler to help highlight the row or section they’re currently working on.
If you’re using a digital pattern app such as Pattern Keeper, you can mark your progress directly on the screen. I create my patterns to be compatible with Pattern Keeper, and it’s one of my favorite ways to keep track of a project.
Whatever method you choose, the goal is the same: make it easy to see where you left off and where you need to stitch next.
What Do Other Marks on a Cross Stitch Pattern Mean?
Most of the chart will be made up of squares containing symbols for your full cross stitches. But you may occasionally see other marks or lines within the design.
These can represent stitches such as:
Backstitch
French knots
Half stitches
Quarter stitches
Other specialty stitches
Don’t worry if these marks look different from the main chart. Your pattern’s key or instructions should explain what they mean and how to stitch them.
You may also see lines running through or around the design that look different from the regular grid lines. Pay attention to the key because these could represent backstitch or another type of stitch rather than a grid line.
If you’re working with a simple beginner pattern, you may only need to worry about full cross stitches at first.
What If the Cross Stitch Pattern Looks Confusing?
If you look at your pattern and feel completely overwhelmed, take a step back.
You don’t need to figure out the whole design before you start stitching.
Choose one small area and focus only on that. Find a symbol, check the key, and make that stitch. Then move to the next one.
Before long, those individual stitches will start coming together and you’ll see your design taking shape.
And remember: you are not expected to stitch perfectly. Cross stitch is meant to be a relaxing, enjoyable craft. If you make a mistake, it’s usually fixable—and sometimes those little imperfections are part of what makes a handmade piece special.
Ready to Try Your First Cross Stitch Pattern?
Now that you know how to read a cross stitch chart, you’re ready to put those new skills to work.
A small, simple design is a great place to start. You’ll get comfortable matching symbols, following the chart, and keeping your place without having a huge project in front of you.
Grab my free beginner-friendly cross stitch pattern and stitch along as you put everything you’ve learned into practice.
Final Thoughts
Learning how to read a cross stitch pattern is much easier once you understand what the different parts of the chart are telling you.
Remember:
The chart shows you where to stitch.
The symbols tell you which thread color to use.
The pattern key explains the symbols and thread colors.
The numbers and grid lines help you count and keep your place.
The center marker can help you position your design on your fabric.
You only need to focus on one small section at a time.
Once you get started, those little squares and symbols won’t seem nearly as intimidating. Before long, you’ll be reading your cross stitch patterns almost without thinking—and watching those little stitches turn into something beautiful.
Frequently Asked Questions
What do the symbols on a cross stitch pattern mean?
The symbols on a cross stitch chart represent different thread colors or stitches. Use the pattern key to match each symbol with its corresponding thread color.
Do I start cross stitch from the middle?
Starting from the center is a popular method, especially for beginners, because it helps position the design correctly on your fabric. However, you don’t always have to start in the center.
What do the numbers on a cross stitch chart mean?
The numbers along the edges of a cross stitch chart help you count stitches and locate specific areas of the design.
What are the dark lines on a cross stitch pattern?
Dark grid lines usually divide the chart into groups of 10 stitches to make counting and following the pattern easier. Lines that appear within the design may instead represent backstitch or another stitch.
Can I use a cross stitch pattern on Pattern Keeper?
Some digital cross stitch patterns are compatible with Pattern Keeper. Check the pattern’s listing or instructions to see whether it can be imported into the app.