

Let’s learn how to finish an embroidery hoop — because it’s one of those small steps that makes a big difference in how your work looks and feels when it’s all done. You’ve put so much time and care into your stitching — the front of your hoop is beautiful — and covering up that messy back just makes the whole thing feel complete.
This beginner-friendly embroidery tutorial will walk you through a few different ways to do it, so you can choose whichever method works best for you.
Whether you’re just starting to learn embroidery or you’ve been stitching for a while and have been putting this finishing step off, you’re in the right place.
Disclosure: As an Amazon Associate, I earn from qualifying purchases at no extra cost to you.
Click here for a FREE EMBROIDERY PATTERN
Why Bother Finishing the Back of Your Embroidery Hoop?
Finishing the back of your embroidery hoop is not strictly necessary. If your finished piece is going to hang on the wall, no one is ever going to flip it over and scrutinize your knots. But there is something genuinely satisfying about knowing your work is tidy all the way through.
The back of a finished embroidery project tends to look like organized chaos — loose threads, knots, little tails of floss going every which way. It’s the behind-the-scenes mess that makes the front look magical, but it doesn’t exactly feel like a finished piece.
Knowing how to finish an embroidery hoop properly gives it a polished, professional look — the kind of finish you’d proudly gift to someone or display with confidence. It’s also a lovely, meditative little task, and a great way to wrap up a project properly.
Three Ways to Finish an Embroidery Hoop
There are a few different ways to finish the back of an embroidery hoop, and the right one for you depends on how much time you have and the kind of finish you’re after. Here’s a quick overview before we dive into each one.
Method 1: Hot Glue — Quick and beginner-friendly. Great if you just want the job done.
Method 2: Whip Stitch — A simple hand-stitched option that’s a step up from gluing.
Method 3: Blanket Stitch — The most polished finish. This is the method used here at Bella Savoy, and the one this tutorial focuses on most.
What You’ll Need
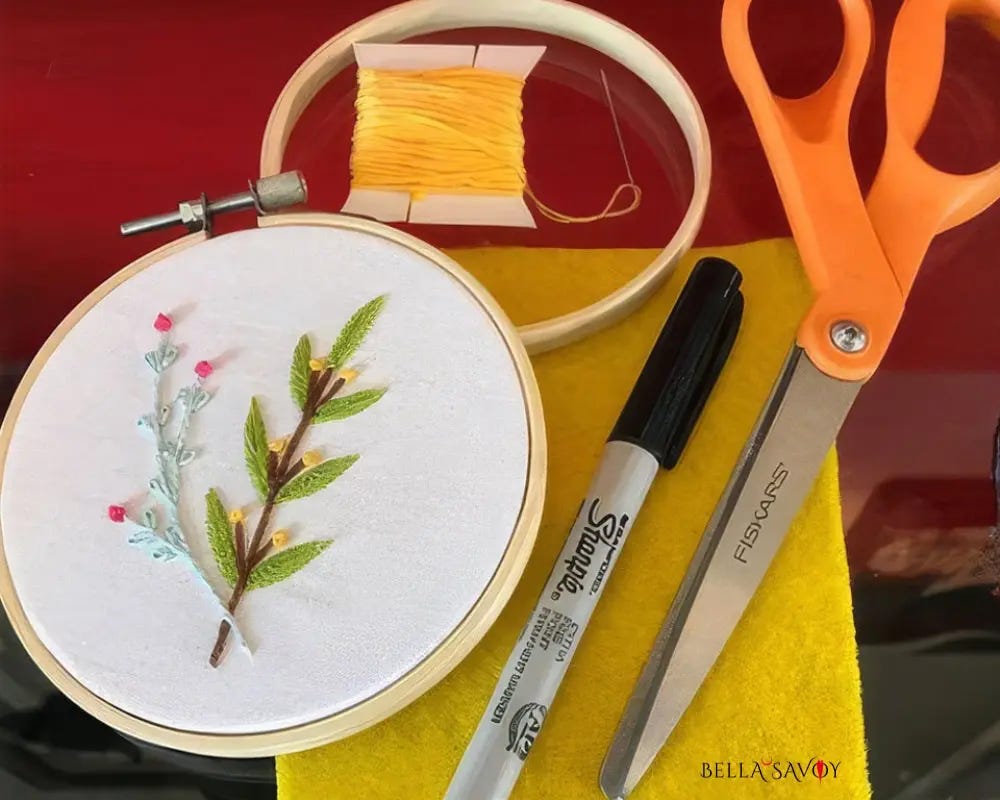
Your finished embroidery piece, still in the hoop
A piece of felt in a coordinating color
A thin Sharpie marker
Scissors
Needle and thread in a color that matches your felt
Hot glue gun and glue sticks (Method 1)
Before You Begin: Prep the Fabric and Felt
No matter which method you choose, you’ll start with the same prep steps.
Trim the fabric
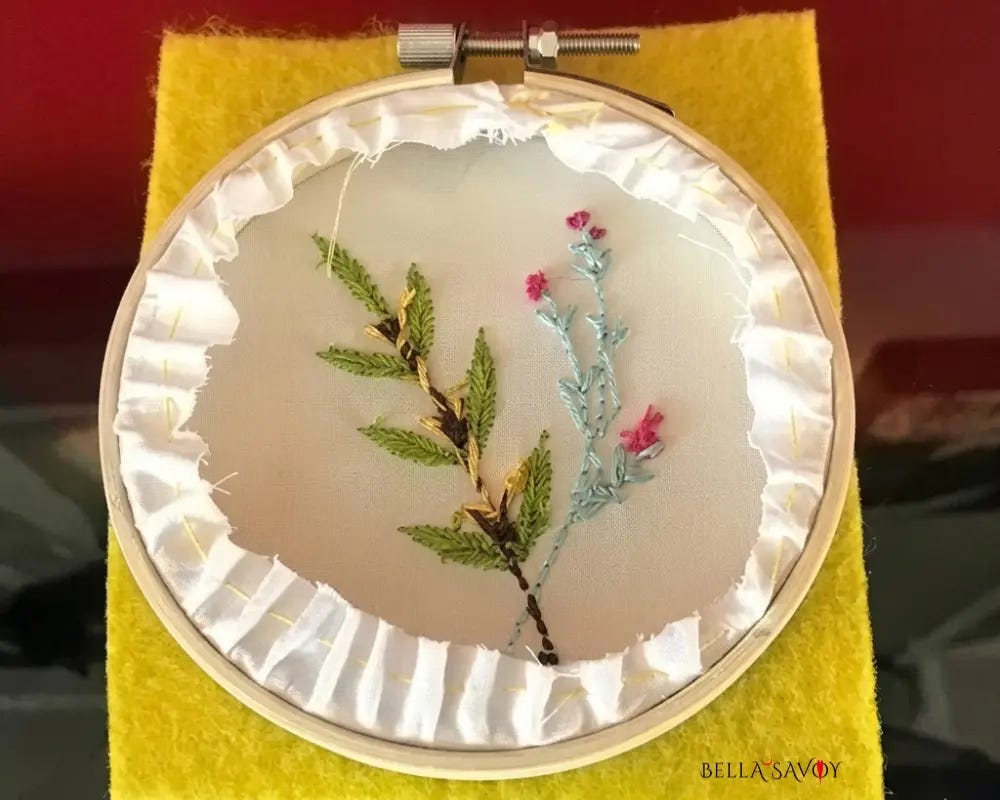
First, trim the excess fabric down to about ½ inch from the edge of the hoop. This reduces bulk and makes everything easier to work with.Gather the fabric
Flip your finished embroidery over so you’re looking at the back. Using a needle and thread, sew a running stitch all the way around the edge of the trimmed fabric, just inside the hoop. As you go, gently pull the thread so the fabric gathers and bunches toward the center. Once you’ve gone all the way around, pull it snug and tie it off.Cut the felt circle
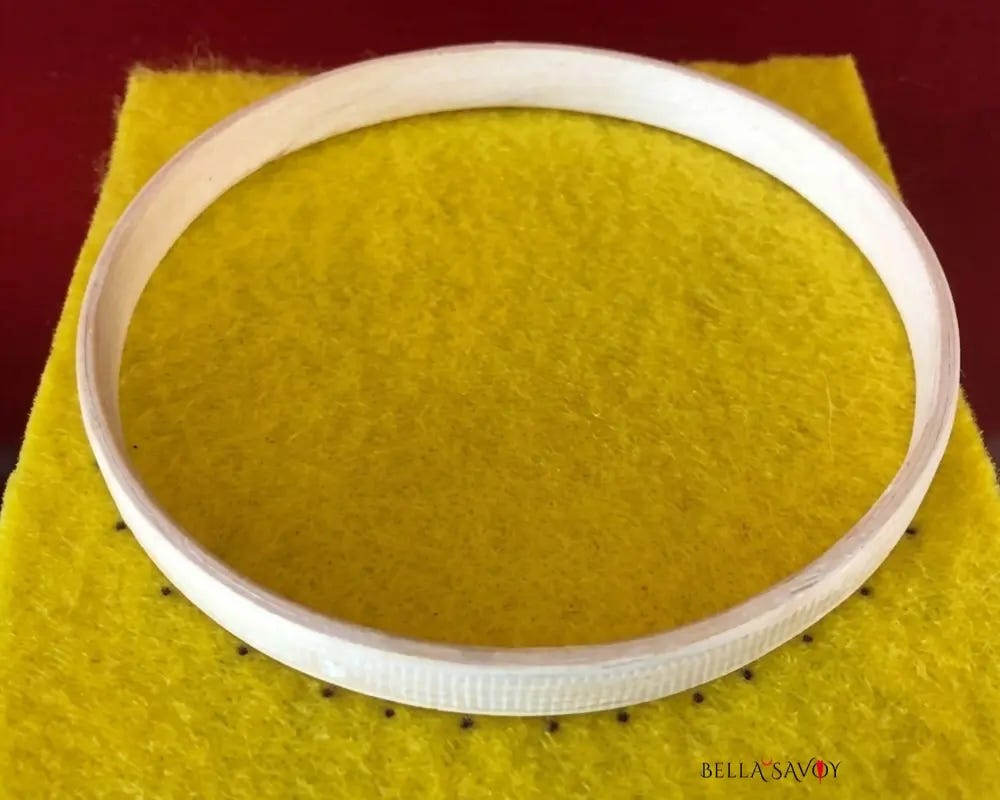
Separate your second embroidery hoop and take the inner ring. Place it on top of your piece of felt and trace around the outside with your Sharpie. Using small dots instead of a continuous line makes this much easier — the hoop stays put and the dots are simple to follow when cutting. Cut out your felt circle. It should fit neatly inside the hoop and cover all those threads and knots on the back.
Method 1: Hot Glue
Hot glue is the fastest way to finish an embroidery hoop, and it’s a perfectly valid option — especially if you’re short on time or new to hand stitching.
How to do it:
Cut your felt circle to fit the inner hoop.
Apply a thin line of hot glue around the back edge of the hoop and press your felt circle firmly into place.
Hold it down until the glue sets, then trim any felt that extends past the edge.
One tip: avoid getting glue on your embroidery stitches, and let everything dry fully before hanging.
Hot glue is fast and easy, but it is permanent — so it’s not ideal if you think you might want to re-hoop the piece later.
Method 2: Whip Stitch
The whip stitch is a simple, quick hand-stitching option that gives a neater result than glue without requiring much skill. It’s a great choice if you’re building your hand embroidery basics but aren’t quite ready for the blanket stitch yet.
How to do it:
Place your felt circle on the back of the hoop.
Thread your needle and knot the end. Starting at any point along the edge, push your needle up through both the felt and the gathered fabric.
Loop the thread over the edge and push the needle through again a little further along — always in the same direction, always over the edge.
Keep your stitches evenly spaced and at a consistent angle. Continue all the way around until you reach your starting point.
Knot off the thread by weaving it through the last few stitches before snipping.
The whip stitch is fast and tidy, and it holds the felt securely. It won’t have quite the decorative finish of the blanket stitch, but it gets the job done neatly.
Method 3: Blanket Stitch (Recommended)
This is the method I use, and honestly — it’s a favorite for good reason. The blanket stitch gives your embroidery hoop the most polished, handcrafted finish of the three methods, with a lovely looped border all the way around the edge. It takes a little more time, but the result feels genuinely beautiful.
Here’s how to work it:
Place your felt circle on the back of your embroidery hoop and bring your needle up from behind, just inside the edge of both the felt and the gathered fabric.
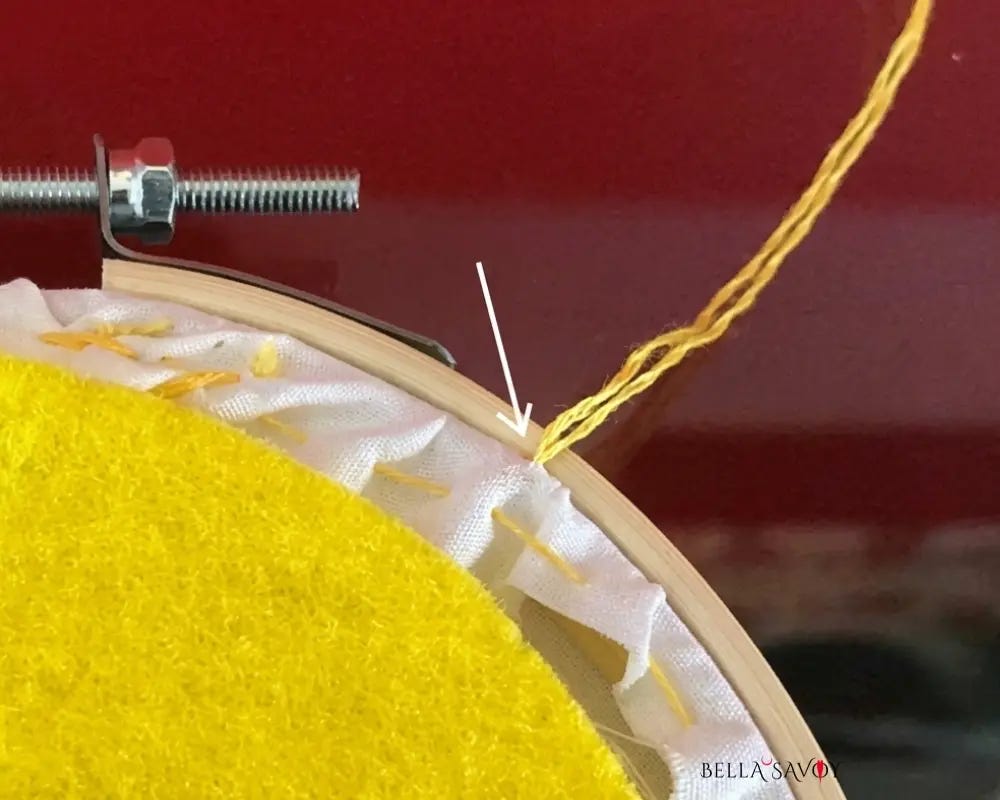
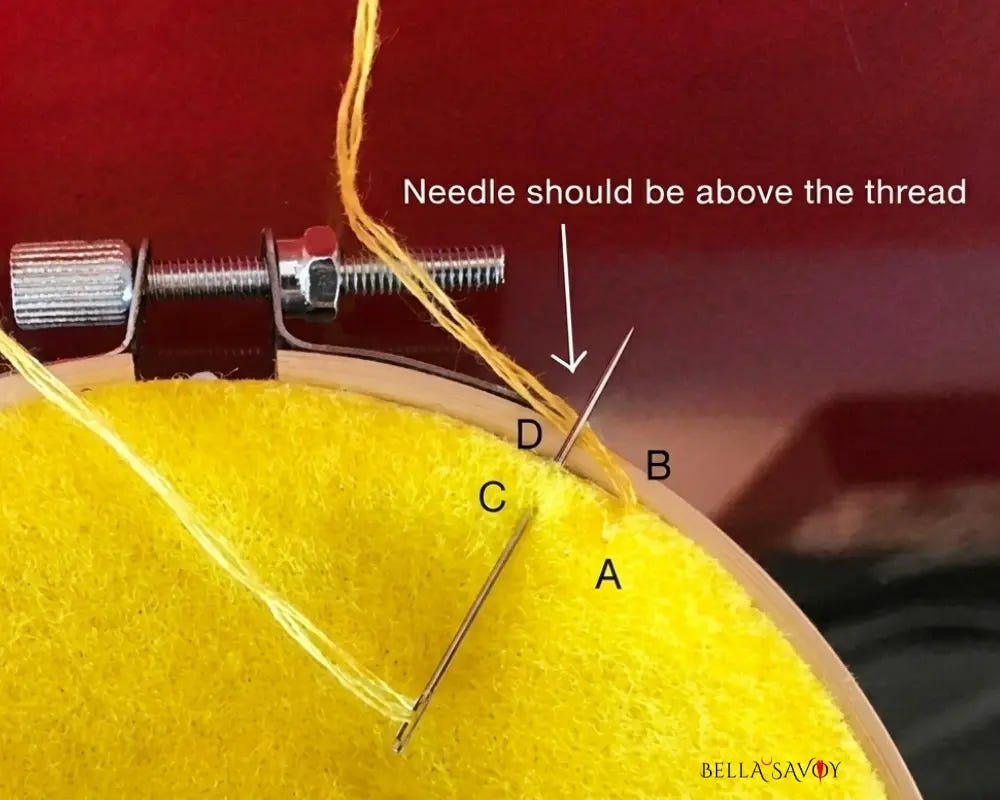
Push the needle through the back of your felt, at point A near the edge, then bring it halfway back up at point B, wrapping the thread behind the needle before pulling it through.
Repeat a short distance away: push the needle through at C and D, wrap the thread behind it, then pull through.
Continue in this rhythm all the way around, making sure each stitch catches both the felt and the fabric beneath it.
Once you’ve stitched all the way around, weave your thread back through the last stitch a couple of times to anchor it.
Then push your needle through to the back toward the center of the felt — about an inch from the edge. Pull gently and snip the thread close to the surface. The tail will disappear right into the felt, leaving no visible knot or loose end.
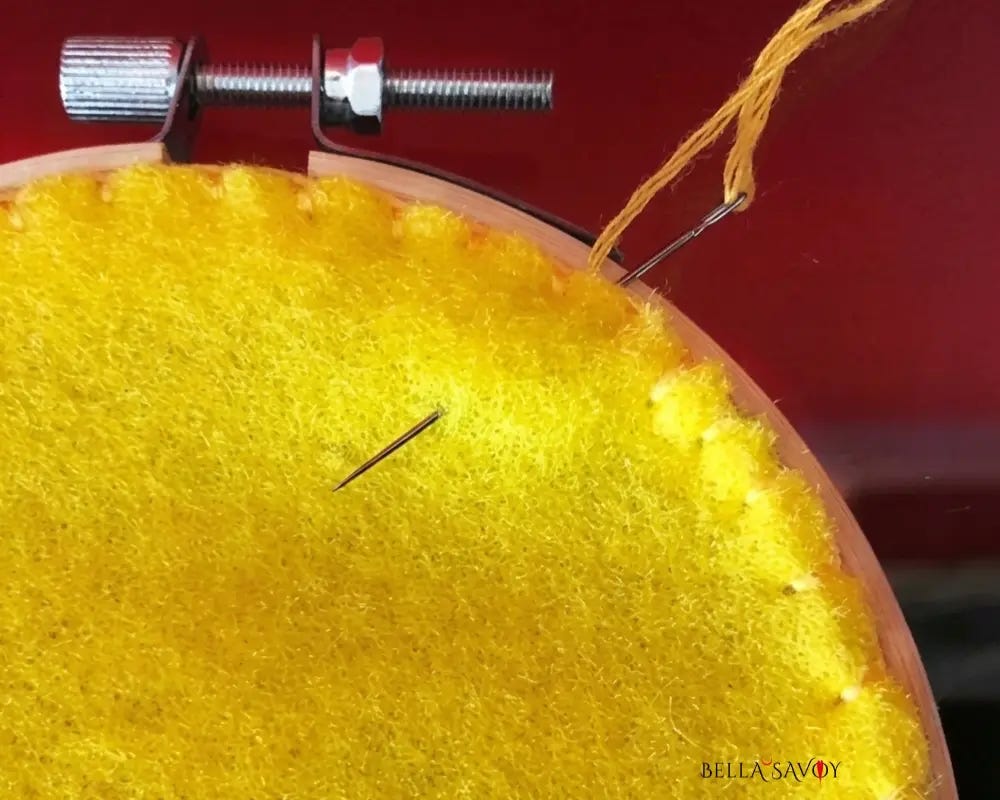
That’s it! Your hoop is finished.
The Finished Result
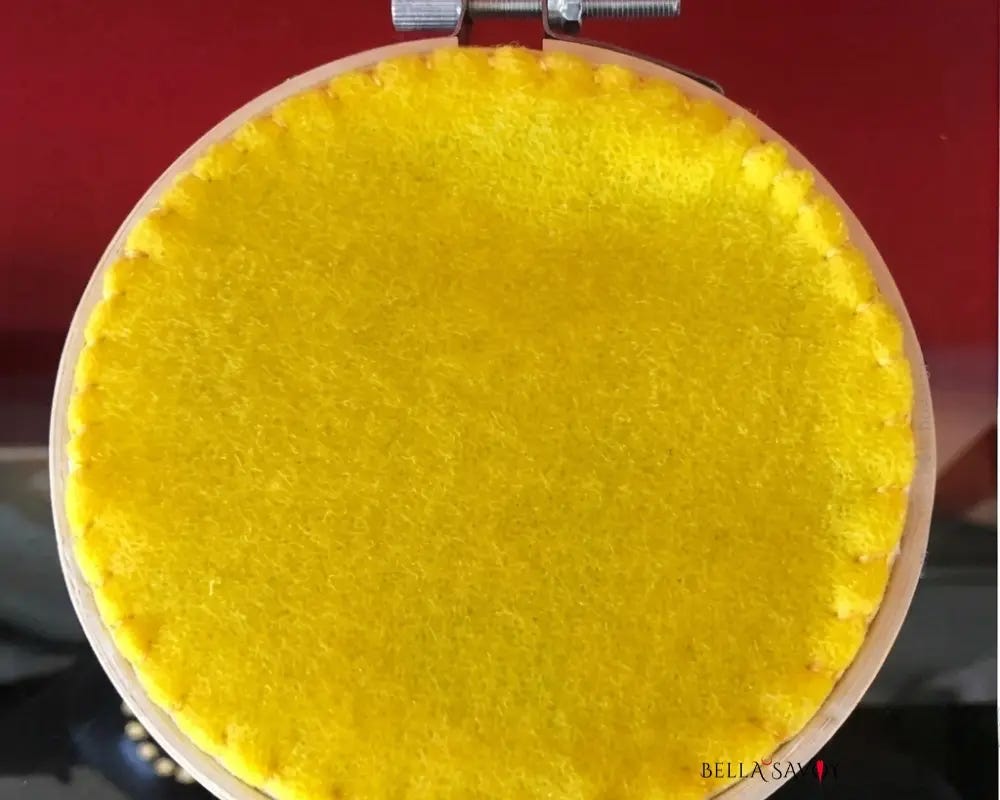
When you flip the hoop over and see that neat felt circle with its pretty blanket stitch border, there’s a quiet little satisfaction that’s hard to describe. It looks intentional. It looks complete. It looks like something made with care from start to finish.
This is one of those embroidery basics for beginners that tends to get skipped over — but once you know how to finish an embroidery hoop, you’ll want to do it every single time. Whether you keep the piece for yourself, gift it to someone, or sell it, a clean backing makes all the difference.
Video Tutorial
If you’d like to see how to finish an embroidery hoop in action, there’s a video tutorial on my YouTube channel that walks through the blanket stitch method step by step — a great companion to this embroidery tutorial if you’re a visual learner!

More Embroidery Basics You Might Love
If you’re building your embroidery skills from the beginning, here are a few other posts to explore next:
5 Basic Embroidery Stitches — the perfect starting point if you’re new to hand embroidery
How to Hoop Fabric — get the foundation right before you start stitching
Embroidery Supplies for Beginners — a simple, no-fuss list of what you actually need
Embroidery Needle and Thread Basics — understanding your tools makes everything easier
Every new technique you learn adds to your confidence, and before long these finishing steps will feel like second nature.
Frequently Asked Questions
Do I have to finish the back of my embroidery hoop?
Finishing the back of your embroidery hoop isn’t required — but it’s absolutely worth it. If your piece is going to hang on a wall, no one will ever see the back anyway. That said, adding a felt backing gives your work a polished, finished feel that makes a real difference — especially if you’re gifting the piece or selling it.
What kind of felt should I use to finish an embroidery hoop?
Regular craft felt is the best choice for finishing an embroidery hoop — it’s affordable, easy to cut, and comes in a wide range of colors. Aim for a thickness of around 1–2mm; too thin and it won’t lay smoothly, too thick and it’s tricky to stitch through. Choose a color that coordinates with your fabric and your finished hoop will look really cohesive.
What is the easiest way to finish an embroidery hoop for beginners?
For beginners, hot glue is the easiest way to finish an embroidery hoop — it’s fast, simple, and requires no hand stitching. If you’re comfortable with a needle and thread, the whip stitch is a great next step. The blanket stitch takes a little more practice but gives the most polished result and is well worth learning as your embroidery skills grow.