

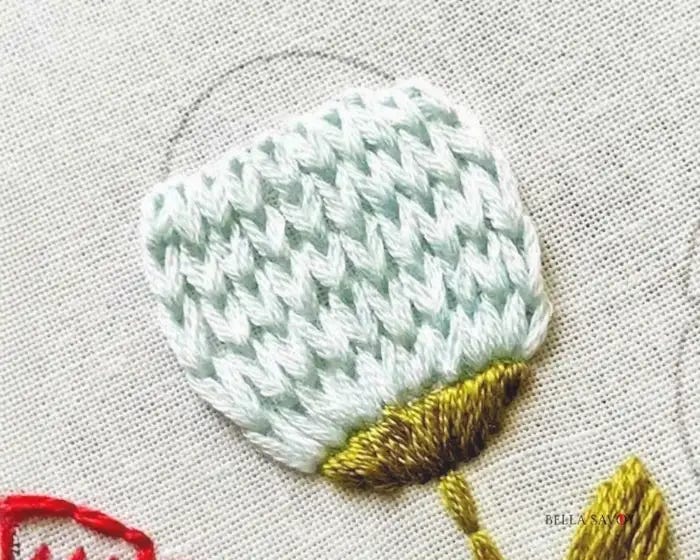
Create solid lines and gorgeous textured fills with the chain stitch. If you’re looking for an easy embroidery stitch that delivers big impact, this is it — the chain stitch is beginner-friendly, incredibly versatile, and adds beautiful volume and texture to just about any design.
The chain stitch forms a series of connected loops that build a strong, textured effect, perfect for outlining shapes or filling in spaces. It has a similar feel to crochet stitches, and when used as a fill, it creates an elegant, dimensional look. Think of the bold, defined lines in traditional tattoo art — the chain stitch brings that same eye-catching quality to embroidery.
Disclosure: As an Amazon Associate, I earn from qualifying purchases at no extra cost to you.
Click here for a FREE EMBROIDERY PATTERN
How to Make the Chain Stitch
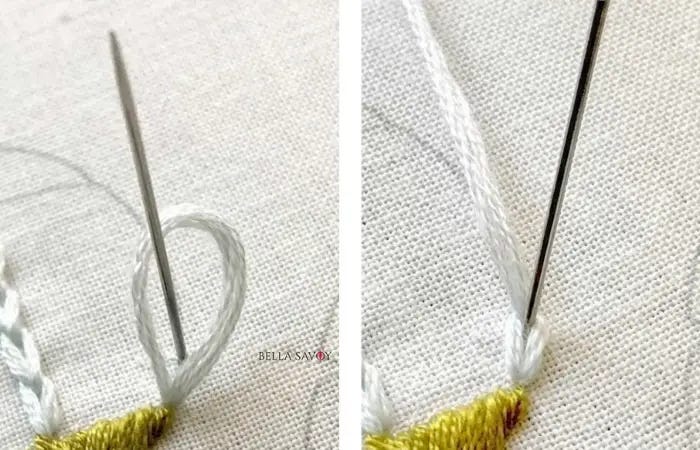
Come up through the fabric and go back down through the same hole (or very close to it), leaving a small loop.
Push your needle up through the loop about one stitch length away to create the signature chain shape.
Pull the needle all the way through and let the loop settle naturally into place. Optional: before pulling through, gently tug the thread from the back so it hugs the needle — this gives a tighter, more controlled stitch.
To start the next chain, go back down through the same spot where you last came up, right inside the loop. Leave the new loop a little loose at the top, then repeat.
Continue until you reach your desired length, then anchor the last loop with a small stitch over the end.
Using the Chain Stitch as a Fill
To fill a shape, lay rows of chain stitches side by side. Place them close together for a solid, dense fill, or space them out for a looser, airier look where the fabric peeks through. Either way, the texture and depth it adds are so satisfying.
You can also try following the contours of your shape rather than working in straight rows — this is sometimes called contour filling, and it gives a really organic, flowing look that works especially well for leaves, petals, and rounded shapes. Either approach adds wonderful texture and depth, and it’s worth experimenting with both to see which feel you prefer.
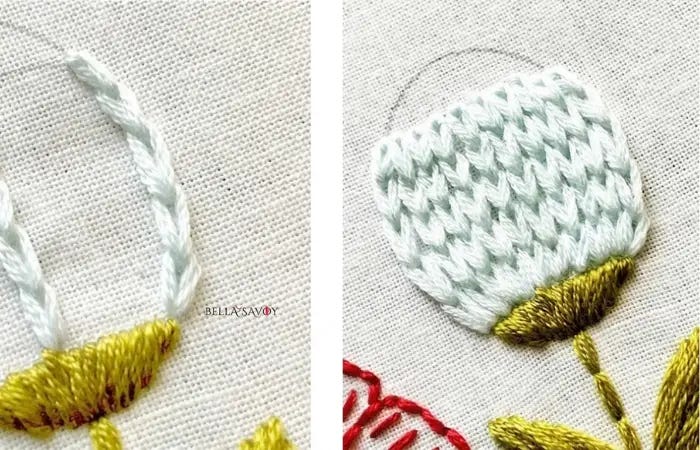
Repeat these steps until you’ve reached a happy length. To end the stitch, add a small stitch to the end of your last loop.
If you want to fill in a shape, simply lay rows of chain stitches next to each other to create beautiful texture and depth. How cute is that? The chain stitch adds so much character and dimension to your design! You can place the stitches very close together for a tighter, more solid fill, or space them out a bit for a looser, more open fill where the fabric peeks through.
This flexibility allows you to customize the look based on the style you’re going for, whether it’s bold and defined or soft and airy. Experiment with both techniques to see which one suits your project best.
Tips for a Neater Chain Stitch
A little attention to technique goes a long way with this stitch. Keep these in mind as you practice:
Keep your stitch length consistent. Even stitches give the most polished result. It takes a little practice to find your rhythm, but once you do, the difference is noticeable.
Adjust your stitch length for curves. Shorter stitches give you more control on curved lines and detailed areas, while longer stitches work beautifully on straight lines and bold outlines. If your chain is pulling or puckering on a curve, try shortening your stitches.
Don’t pull too tight. Each loop should lie flat and relaxed against the fabric. Pulling too hard will distort the chain and cause the fabric to pucker — let the thread settle naturally before moving to the next stitch.
Keep your loops consistent in size. It’s easy for loops to creep larger or smaller as you go, especially when you’re just learning. Periodically glance back at your previous stitches to make sure things are staying even.
Use a hoop. Keeping your fabric taut makes it much easier to control your tension and stitch size, and you’ll end up with a cleaner, more even chain overall.
Video: Chain Stitch Tutorial
I hope this chain stitch tutorial has you excited to pick up your needle! It’s such a rewarding stitch — simple to learn, but with so much potential for bold lines, beautiful fills, and everything in between. Grab your favorite drink, get cozy, and don’t forget to watch the video for a step-by-step walkthrough. Happy stitching!
