🖤This long and short stitch tutorial is going to help you fill shapes and create color gradations easy! Use a single color or add depth and visual interest using several colors of thread. Even create hombre color effects.
I’m going to show you how easy the long and short stitch is for filling in spaces and creating visual interest that will make your embroidery work even more awesome!
You may have seen this embroidery stitch being used to create a painting-like effect, which is quite extraordinary! I think this is why it can seem a bit intimidating but, it’s actually not as complicated as it may seem and it’s not just for thread painting. It can be used to make amazing color effects and it’s also quite practical for simple solid fills.
To add some texture to a shape that needs filling there are a lot of options, but I’m focusing just on the long and short stitch in this tutorial, and in the end I hope you’ll see just how easy this stitch really is!
Table of Contents
Steps
The guide is optional but it can be helpful. For this tutorial, I’ll use a circle with 3 horizontal guidelines.
Add one row of long and short stitches. Start by filling in the top section of the circle. This is the first row of long and short stitches. Just add straight stitches right next to each other in various lengths. See how my stitches have 3 different lengths? I simple add a short, then medium, then long stitch, then I mirror that and repeat.
You could also use just 2 lengths, short and long. I’ve done that to the right side of my circle.
Add another row of long and short stitches below it. Each stitch you add should meet up with the one above it in the first row. Remember, on the left half of my circle, I used 3 lengths and used 2 on the right. You should be able to see a big difference.
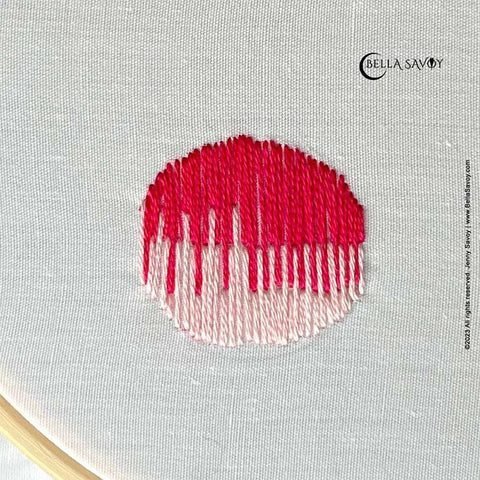
If you were filling in a space that required more than 2 rows, then you would do just as you did with the pink thread, except the edge along the bottom would also alternate in lengths and be ‘jagged’ to look like the 1st row in red. I do this in my video tutorial below so you can see just what I mean if you need additional clarity.
Freestyle Long and Short Stitch
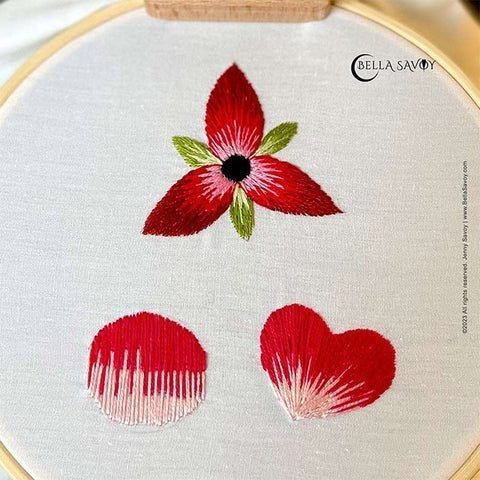
One of the things I love about this stitch is that it can be made with one color or several colors, and the approach can be methodical or free-style.
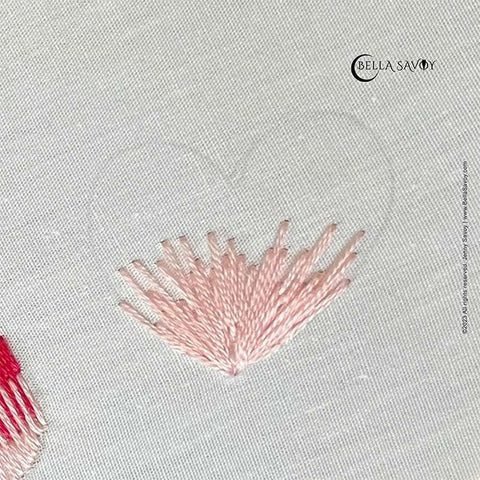
When filling in a shape with a solid color I always opt to go free-style, and that just means there’s really no rhyme or reason to the stitching method. I just add straight stitches in various lengths to the shape so there are some spiky ends. For the most part though, the stitches tend to go in a general direction so it’s not completely haphazard.
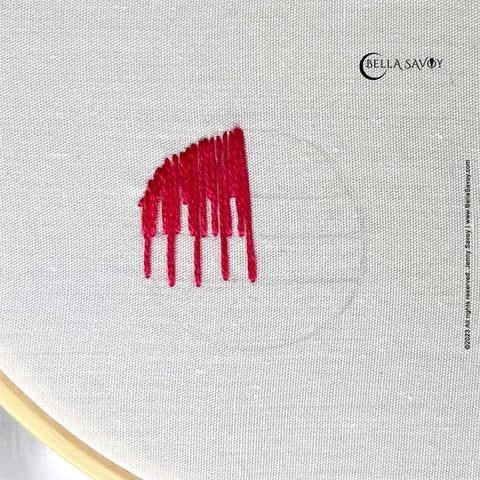
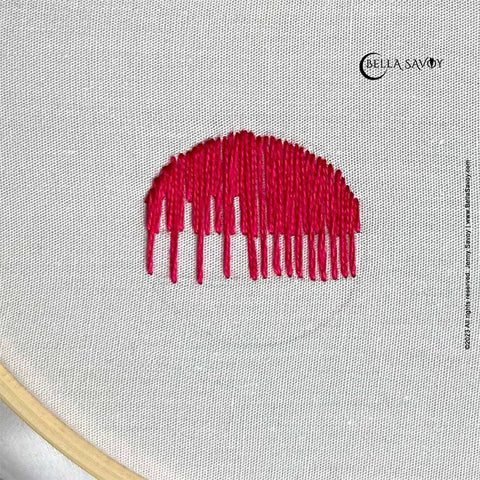
But you can do this using more color too! Here I added pink thread in various lengths so the top part of the pink layer is jagged.
Then I added red and simply filled in the spaces between the pink thread. I like to divide my shape up using my thread and I treat is a guide to make sure the direction of my stitches are straight.
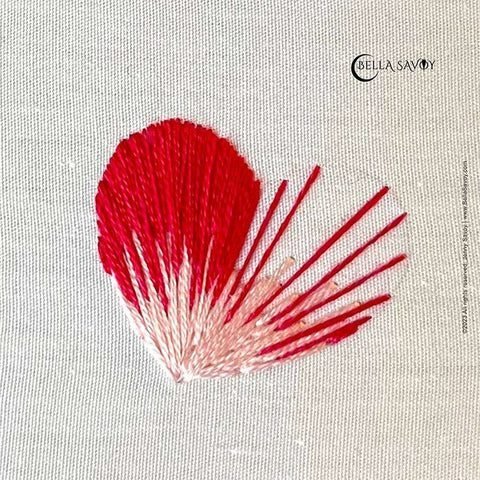
Then I go ahead and fill in the spaces in between. I love how it gives the heart a bit of a ray effect!
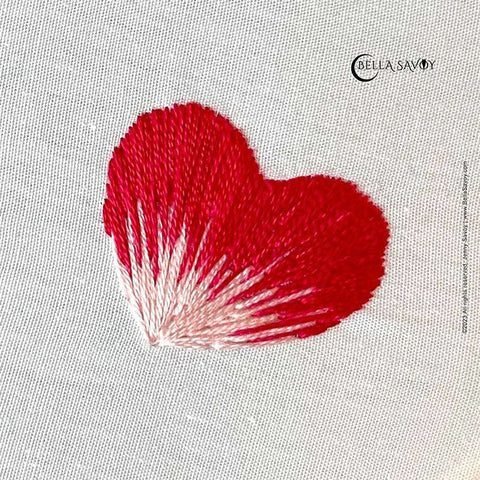
The long and short stitch in the heart was done freestyle and personally, freestyling it is my favorite approach. It’s much more fun!
Long and Short Stitch Tips
Here are some stitch tips that will help make the long and short stitch even better:
-
Adding an outline stitch to the shape before stitching the long and short stitch can help make the edges a bit more crisp. Totally optional though.
-
It really does help to use guidelines when first learning this stitch, especially if you’re trying to be more methodical.
-
When using 2 or more colors I find that using 2 strands of thread is the best number to get the smoothest transition from one color to the next, mainly because the bulk of the thread is minimal which reduces a bit of texture. For solid color fills I usually use 4, but it may be different for the next person.
-
Sometimes, when one color meets the next color, the hole you created when returning to the back can be obvious which may be distracting. If that’s the case, overlap the threads a tiny bit. Then return to the back either slightly next to each other or through the tip of the other color (so it’ll split the thread).
-
The edge of each row should always look kind of like rays for best results. Another reason I prefer the freestyle method is that when I finish my design and I feel like it could use a few more long stitches it’s easy to add a few here and there. You can still do that if you’ve approached the long and short stitch more methodically but sometimes (not always) it’s obvious so just be a bit more careful in this case.
I hope this long and short stitch tutorial inspires you to create beautiful fill stitches the next time you’re enjoying some quiet self-care with your needle and thread. Don’t forget to check out other embroidery stitch tutorials!
Happy Stitching!