🖤 Let’s dive into this oyster stitch tutorial and explore a beautiful, textured embroidery technique! The oyster stitch is an elegant, intermediate-level hand embroidery stitch that adds a unique, decorative touch to your designs. It’s a variation of the detached chain stitch, but with a charming twist in the center that gives it a raised, textured look.
While it may seem intricate at first, it’s easier than it looks—and with a little practice, you’ll master it in no time. Follow this step-by-step guide, or skip ahead to the embroidery stitch tutorial video below if you prefer a visual demonstration.
Basic stitches like the detached chain stitch are incredibly versatile, but adding new techniques like the oyster stitch to your embroidery skills can open up so many creative possibilities. Whether you’re embellishing floral designs, borders, or intricate patterns, this stitch adds a beautiful, textural effect. Plus, embroidery can be a calming self-care activity, giving you time to slow down and enjoy the process of creating something by hand.
The oyster stitch builds on the structure of a detached chain stitch, with an extra twist that gives it a unique finish. If you’ve stitched a chain stitch before, you know it forms interlinked loops, while a detached chain stitch is a single, unconnected loop. The oyster stitch takes it a step further, adding a bit of dimension and making it perfect for decorative elements like flower petals, vines, or textured borders.
Although this stitch might take a few tries to perfect, don’t get discouraged! I’d consider it an intermediate-level stitch, but with steady hands and a little patience, you’ll have it looking polished in no time. My first few attempts were far from perfect, so if yours look a bit off at first, that’s completely normal. The key is to keep your tension even and adjust your loops as needed.
By the end of this oyster stitch tutorial, you’ll have a stunning new stitch to add to your embroidery repertoire. Ready to give it a try? Grab your needle and thread, and let’s get stitching!
What To Do With the Oyster Stitch?
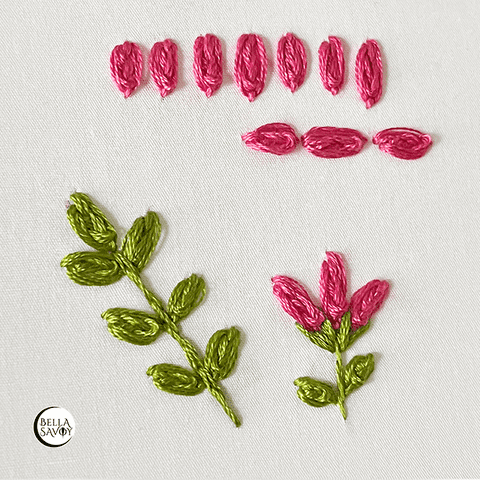
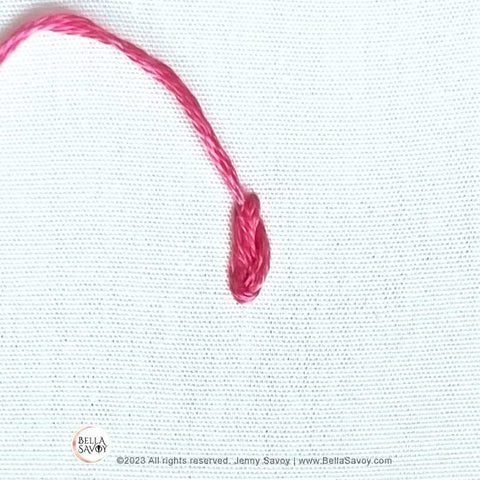
The oyster stitch has a little twist inside of a loop and my favorite use for it is making flower buds. It gives them texture and feels a bit as if there are petals all bundled together. Group them together to create a flower or space them out to create an open fill shape.
I’ve also used them to create fun little leaves and open-fills. The texture is what makes this stitch so cute. Try adding it as a unique design element for borders on sewing projects.
Step One
I’m going to draw a small vertical guide with points A, B, & C to make this tutorial a bit easier.
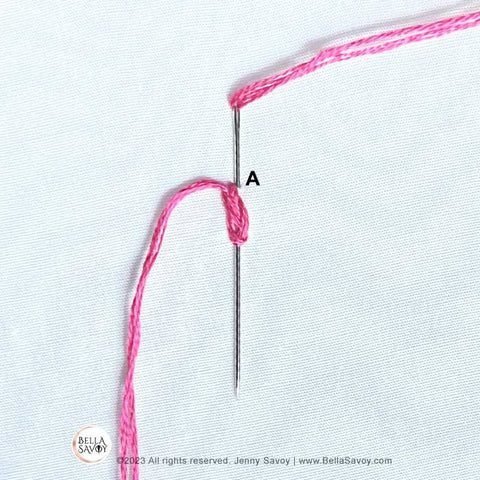
Come up all the way through your fabric at A.
Then push your needle through B, and come up at C. Don’t pull the needle all the way through. It should sit like this:
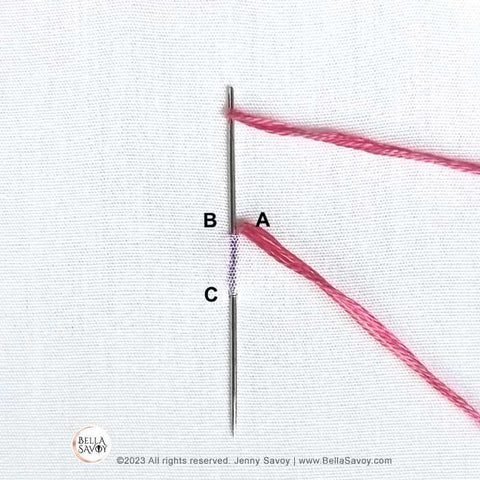
Notice that point A is just a tiny bit off to the right.
Step Two
Pick up your thread and wrap it under the needle from left to right.
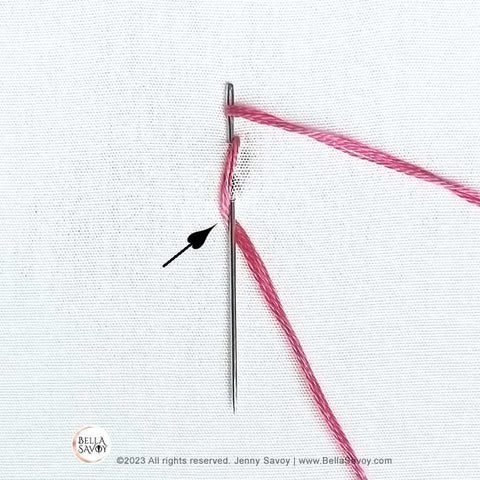
Then pull your needle through.
Tip: I like to use my other hand to control my thread so I don’t accidentally pull too hard which would result in a wonky looking stitch. If you find that your stitches aren’t as pretty as you’d like, try this:
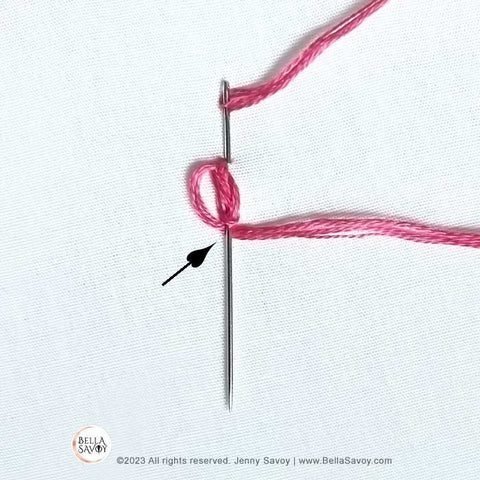
Gently hold your thread against the fabric with your finger (at the arrow), then pull your needle all the way through to create a lovely little twist.
You don’t necessarily need to hold the thread down at the arrow, but I found that this keeps the shape much better.
Step Three
Push your needle under the top right leg of your loop.
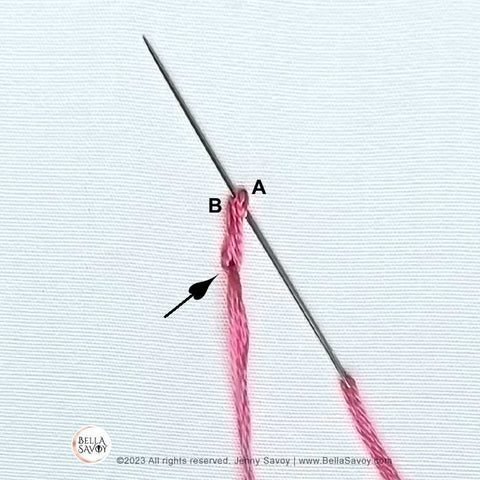
This is where it can get a little tricky. To keep your twist from unravelling, gently hold it down at the arrow as you pull your thread and needle through at the top. Be careful not to pull too hard. The loop should be nice and snug, but not too tight.
Step Four
Next, let’s wrap the thread around your twist. Push your needle through A and back up at the bottom of your stitch so it looks like this:
Wrap your thread under the needle from left to right.
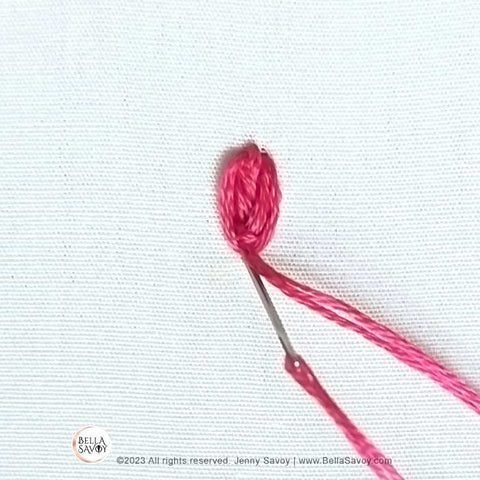
Hold the thread down at the arrow and carefully pull your needle and thread if you need a little help. Adding a little pressure to the thread as you pull is a good way to control how hard you pull and ensures you don’t overdo it.
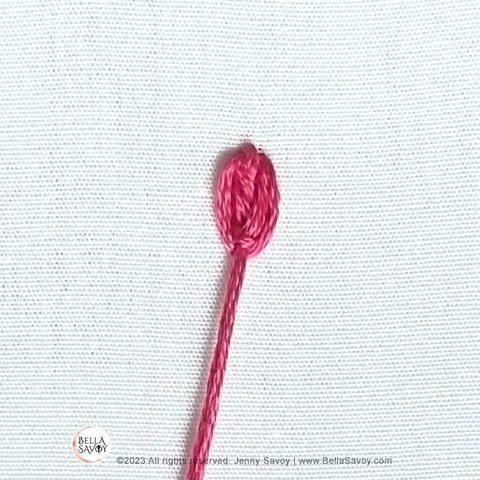
Tie the stitch down by returning to the back at the very bottom of your stitch.
Video: Oyster Stitch Tutorial
As always, here’s a video tutorial. Enjoy!