🖤 Let’s get cozy with the fly stitch, a fun and versatile basic embroidery stitch that’s perfect for beginners learning how to embroider leaves and more! This stitch is an easy way to create flying birds, arrows, simple design elements, and even closed and open fills. The grammar is almost correct, but the sentence can be improved for clarity.
The fly stitch is a ‘V’-shaped stitch, similar to the fishbone stitch but a bit cuter and using less thread. It’s a simple technique involving an open loop stitched down at the bottom. You can use this stitch to make flying birds, leaves, feathers, or arrows—let your creativity flow! In this tutorial, I’ll teach you how to master the basic fly stitch, show you some variations, and even create a leaf using this stitch. I’ll also compare the fly stitch with the fishbone stitch, so you can see the difference when it comes to creating leaves.
Table of Contents
Steps
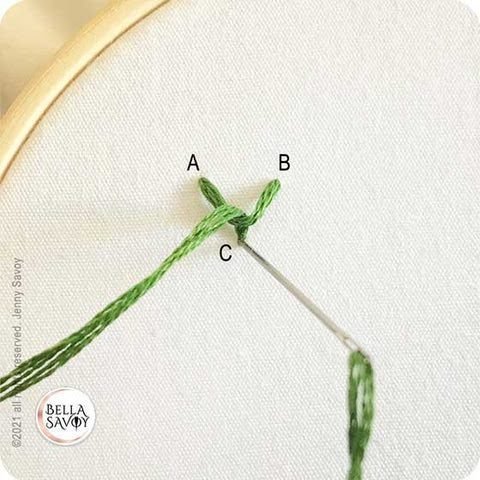
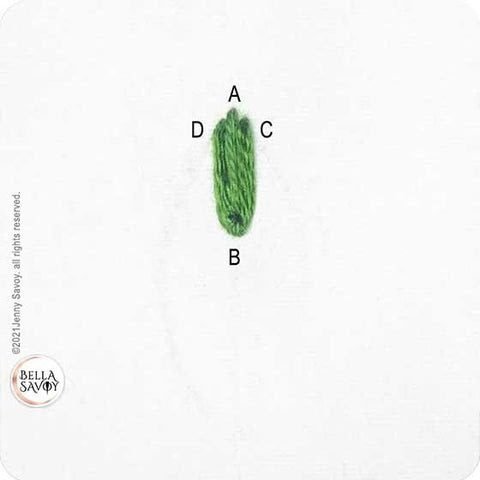
To begin, create a loose seed stitch by bringing your needle up at point A and down at point B. Next, visualize the shape of the letter ‘V’ and determine where the bottom of that ‘V’ would naturally sit.
Bring your needle up at point C, positioned about halfway above your initial stitch. Before pulling the needle all the way through, gently tug the working thread from the back so it hugs the needle at the front, helping to form a crisp, well-defined ‘V’ shape. While optional, this small adjustment reduces strain on the thread, preventing unnecessary wear and tear.
Once the thread is snug against the needle, pull it all the way through to complete the shape. Finally, to secure the ‘V’ in place, make a small stitch by inserting the needle back into the fabric just beyond the working thread, at or near point C.
Grouping and Stacking
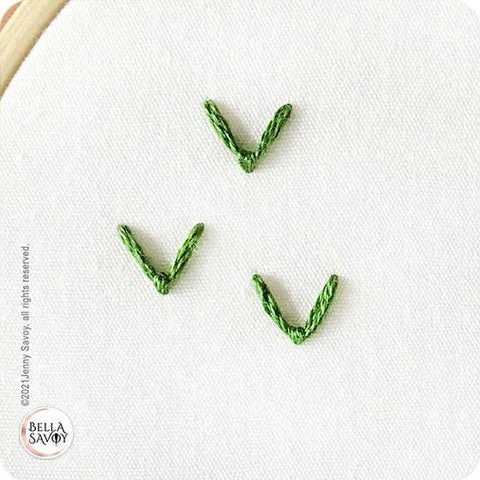
Let’s play with our stitch a bit. It can certainly be used as a stand alone stitch (maybe you want to make a little cat nose), and it can also be used grouped to create different effects.
A few random stitches can make a lovely open fill or it could become 3 flying birds.
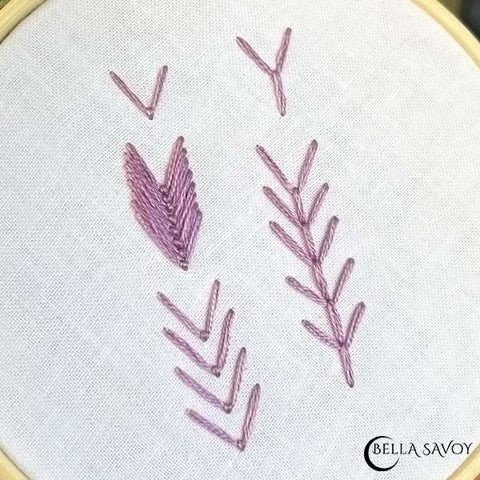
They can also be stacked with or without any space in between each other. The stitch that holds the bottom of the stitch down can also vary from short to long to form a ‘Y’.
Filling a Leaf
Draw a leaf template and create a stitch (A to B) along the top center. This is a simple seed (aka straight) stitch that will help add a point to the tip of the leaf.

Next, add the fly stitch around the seed stitch to build up the leaf.
Come up at C along the edge of the leaf, then down at D at the other edge of the leaf, leaving the thread a bit loose. Bring your needle to the top of your fabric at B and bring it over your loose thread. Then pull your needle all the way up through.
Tie the stitch down by returning to the back just below B.
Continue adding additional fly stitches, one below the other until your leaf is finished.
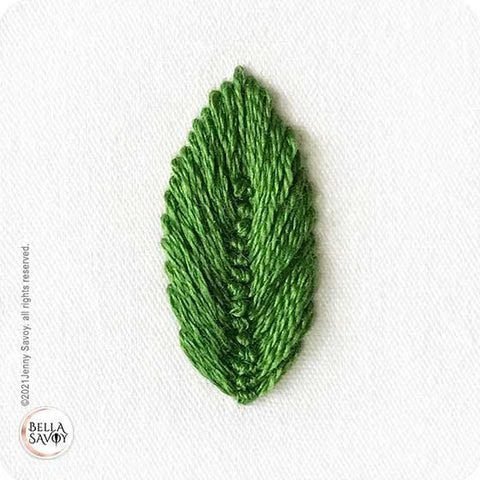
Fly Stitch vs Fishbone Stitch
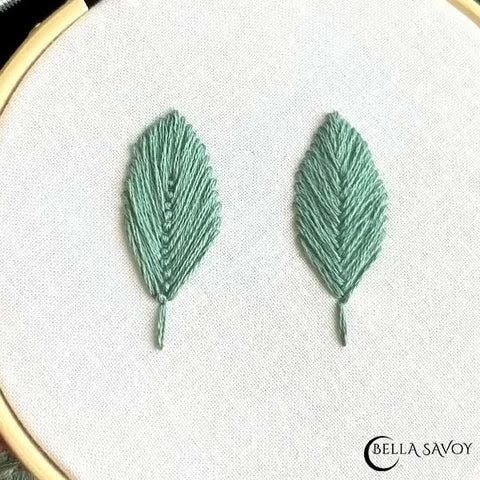
On the left, you’ll see a leaf stitched using the fly stitch, while on the right is a leaf made with the fishbone stitch. At first glance, they may look quite similar, but the key difference lies in how the stitches meet along the spine. The fly stitch forms a well-defined, spine-like appearance, giving the leaf a structured look. In contrast, the fishbone stitch creates a crisscrossed effect, blending the stitches more seamlessly along the center.
Despite this difference, both stitches are considered closed fills, meaning they fully cover the fabric beneath them. If you’re interested in exploring open fill leaves, where the fabric shows through for a more delicate effect, be sure to check out my blog post, where I demonstrate both techniques in detail!
Video Tutorial
We’ve come to the end of this fly stitch tutorial, and I hope you’ll incorporate it into your stitchery magic! And as always, here’s a video tutorial below.